STOS Coders Visual Studio Code Extension
By Neil Halliday
Why Use Visual Studio Code?
Visual Studio Code is a modern editor environment available for Windows, Mac OS and Linux. It supports many features, and is constantly being updated, not only by Microsoft, but also the larger community.
As more and more of us are using Atari ST emulators alongside our original hardware, it became obvious that an improved workflow was required when developing applications within STOS. That is where the STOS Coders extension for VS Code comes in. Not only can we improve and speed up our development process, but we can also leverage the functionality that VS Code has to offer, whilst still programming in the language we all know and love.
The STOS Coders extension for VS Code brings STOS development into the modern era, and we hope you have fun using it.
Overview
Once installed, the STOS Coders extension provides many features that the modern day coder is used to:-
- Syntax highlighting
- IntelliSense
- Auto completion
- Command reference
- Removal of line numbers
- Label definitions
- Include files
- Snippets
- Automated project creation
All the above is supported by the compiler application that converts the extensions .stos files to regular ASCII files that can be imported into STOS Basic. The compiler can create your file directly into your emulated hard disk image, meaning you can be running STOS in one window, whilst coding in another – how cool is that?
The automated project creation feature gets you a core STOS program created and ready to go in seconds – it really is that quick!
Installation
The extension can be installed from within the VS Code editor, or alternatively from the Marketplace website.
Creating Your First STOS project
Creating a new STOS project couldn’t be simpler! Follow these easy steps to create your first STOS project…
1. Open the command palette (Ctrl+Shift+P on Windows & Linux or ⇧⌘P on Mac)
2. Type STOS New and hit [return].

3. Enter the location where you want to save this new STOS project – hit [return] if you want to accept the default. You can paste into this field if you find that easier.

4. Enter the name of this new STOS project – hit [return] if you want to accept the default.

5. Enter the name of the build file that you want to create (See Compiling to STOS for more information about the build file) – hit [return] if you want to accept the default.

6. The STOS VS Code extension will now build the necessary folder and file structure it needs in order to create a STOS development environment. After a couple of seconds, you will see a new VS Code project open. Use the main.stos file to start programming.
CONGRATULATIONS! You have created your first STOS VS Code Project.
Syntax Highlighting
One of the great features of VS Code is the ability to colour code your source to make it more readable whilst working with it. The STOS Extension takes full advantage of these colours to bring you a great experience whilst coding. A colour scheme is provided by the extension, however this can be overridden by installing a different colour theme.
The image below shows you the default colour theme that comes with the STOS extension.
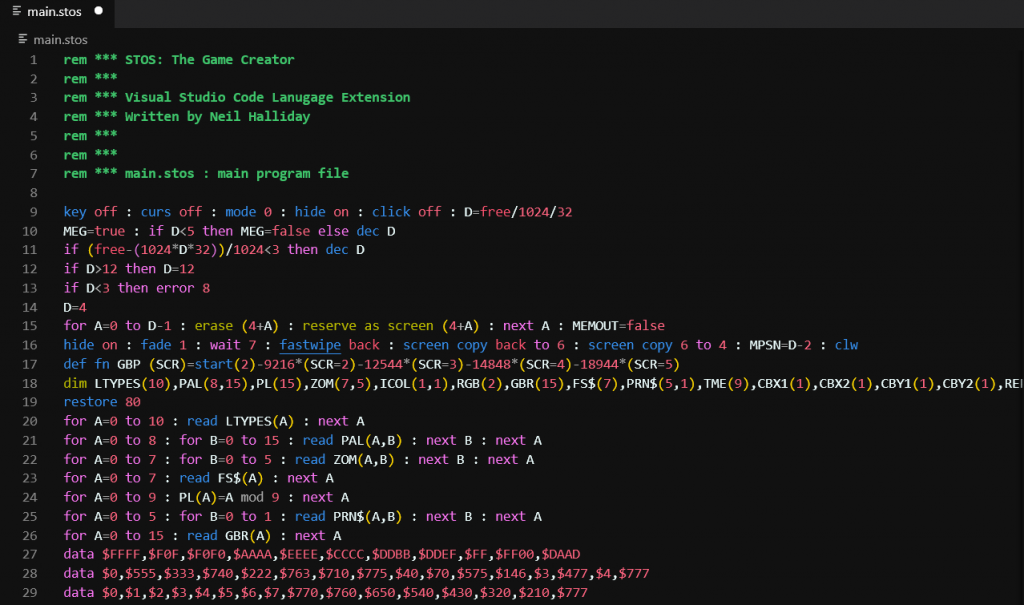
NOTE: In order for the syntax highlighting to work, the extension of your source code file must be .stos
IntelliSense, Auto Complete and Command Reference
As you are coding, you will notice that IntelliSense and Auto Complete are active within your .stos file. The more you type of the command, the more refined the IntelliSense search becomes. Try just entering “i” in your source code, you will get a menu as follows:
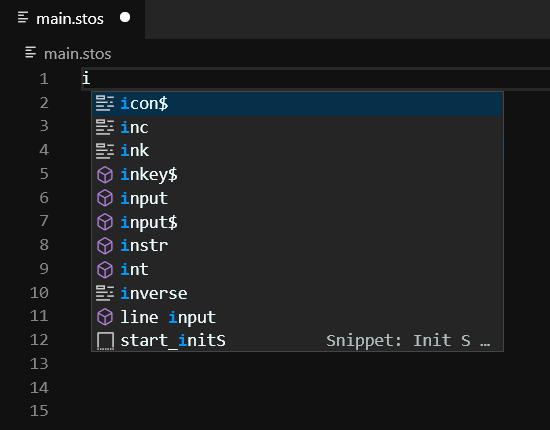
You can move up and down the list with the mouse, or with the arrow keys. Hit your autocomplete key to accept the selected command. Depending on your VS Code configuration, this could be [tab] or [return].
The majority of the available STOS commands also have command reference information available to them. This shows you the syntax of the command, a description of what it does and examples of how to use it.
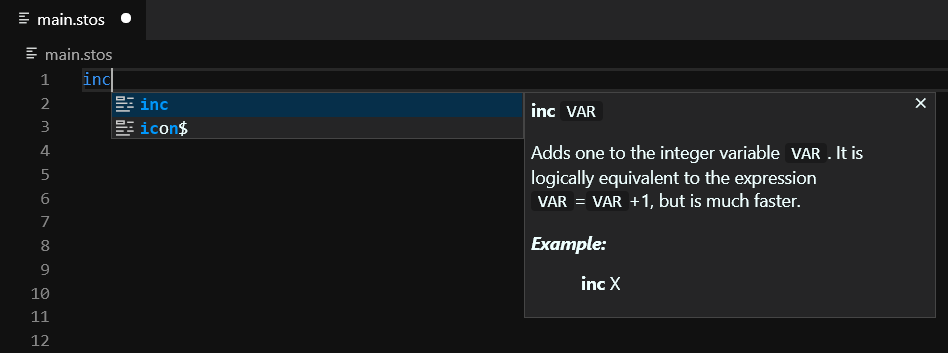
In some instances, there will also be a “SEE” section at the bottom of the command reference, where other commands within the language go together with the command you are viewing.
Comments
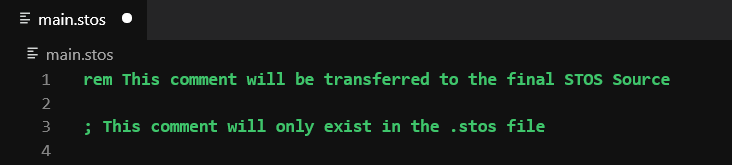
Comments can now be written in two ways within your program. You can either use the standard REM command that we are familiar with within STOS, or alternatively you can use a single ; character at the beginning of a line. REM comments are transferred to your final STOS source code, whereas ; comments are not.
Line Numbers
You no longer need to use line numbers in your STOS code. Each line of code that you create in VS Code will be converted into a STOS line of code, and allocated a line number automatically. Just remember there is still a line limit of x characters, however with the new way of writing code, you will most likely find that you structure your code very differently than in the STOS editor.
By default line numbers are incremented in 10s. However, you can use the #lineinc command to change this.
Includes
It is possible to split up your source code into multiple source files and have them compiled together by using the #include command. There is no limit to the number of include files, and include files can also have includes!
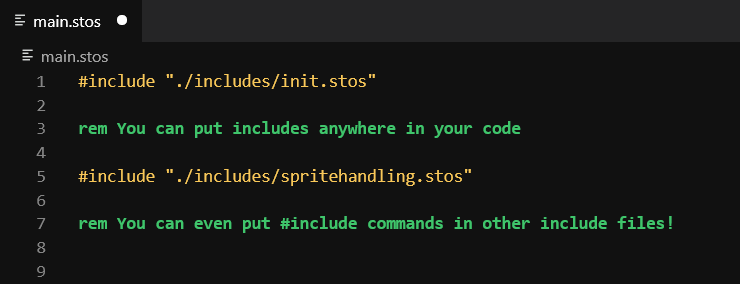
You can name your include files anything that you like, and locate them anywhere within your project folder structure.
- Remember to specify their full relative path to the root of the project structure in order for the compiler to find them.
- Remember to use the extension .stos for VS Code to recognise that the file belongs to the STOS extension and activate the syntax highlighting.
Labels
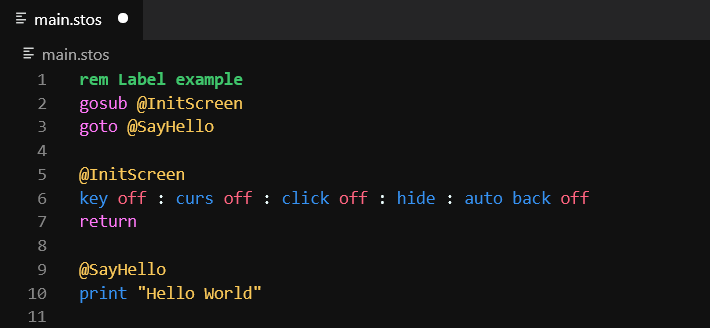
Labels can now be used to make goto and gosub commands more simple. Use the @ symbol at the beginning of a line to identify that this line represents a section of code. You must then give the label a name.
@MyLabel
Within your code, you can reference the label by inserting the full label name.
Please Note: Labels are case sensitive and you will generate a STOS program error when you import the compiled source into STOS Basic. We are planning that in a later version of the extension, we will be able to capture this within VS Code.
Snippets
A number of snippets are available to make the entry of code quicker and easier:
alloff enters the code to switch everything off.
allon to switch everything back on.
lores, medres, hires creates the code for setting the screen resolution
start_initS creates code to set the variable S to be the start of all the memory banks you have reserved.
NOTE: Snippets are an ever evolving thing, and we will be adding more to the list over time. If you have any suggestions for snippets, please let us know and we will include as many as we can.
Compiling to STOS
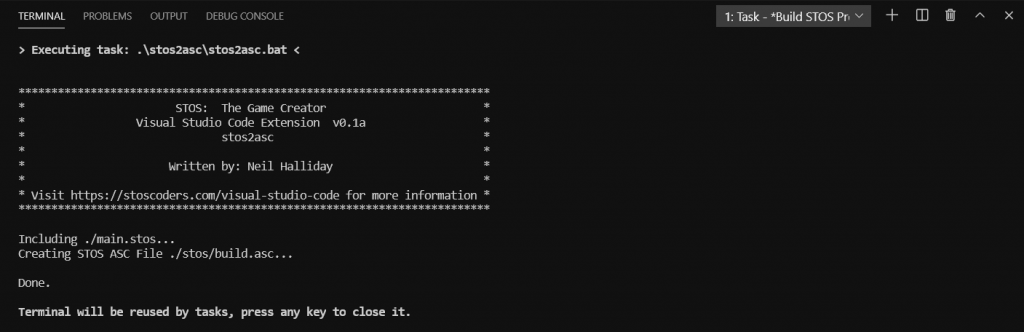
.stos files must be compiled to compatible ASCII files before they can be imported into STOS Basic. This can be done by using Ctrl+Shift+B on Windows & Linux and ⇧⌘B on Mac. This will trigger the STOS2ASC compiler application using the settings that were specified during project creation. The compiler will log it’s output in the Terminal window of VS Code.
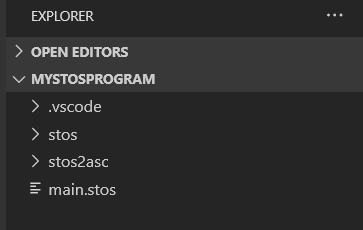
The STOS Project Folder Structure
The STOS project folder is created automatically when using the STOS New command from the command palette. However, you can create this structure manually, should you wish, by copying the contents of a previous project. This can be done in the normal way through your operating system. However you have created your project folder structure, there are some key files that you should be aware of.

Within the project, by default there are three folders
.vscode contains the tasks.json file. This file controls the compilation process command, and should not be changed unless you really know what you are doing. Incorrect changes in this file could lead to you not being able to compile your .stos code to ASCII.
/stos/ is an empty folder that is the default compilation location for your ASCII files. If you are compiling your ASCII file to a different location, such as an emulated hard disk folder, you may delete this folder.
/stos2asc/ is a folder that holds the compilation routines. stos2asc.bat is the command line routine that calls the stos2asc.class file. Ultimately these files will be removed as we incorporate the compiler into the extension.
main.stos is the default source file for your application. You may rename this file if you like, but remember to amend the stos2asc.bat file afterwards if you do.
stos2asc.bat
This batch files runs the Java class to compile the .stos file to the ASCII format that can be imported into STOS Basic. If you have modified any of the above files, please make sure to amend this file as necessary. It’s structure is straight forward and self explanatory.
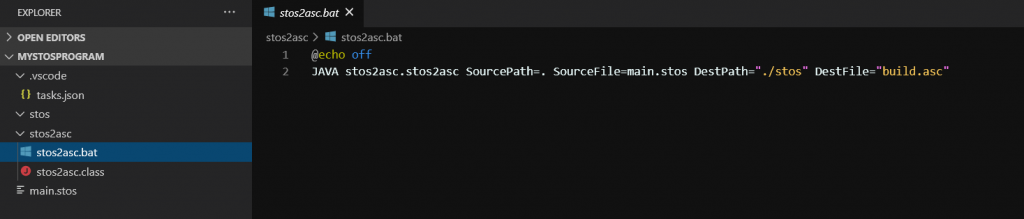
NOTE: At some point in the future, both the DESTPATH and DESTFILE parameters will be replaced with commands within your STOS application. Existing applications will remain compatible when this happens.
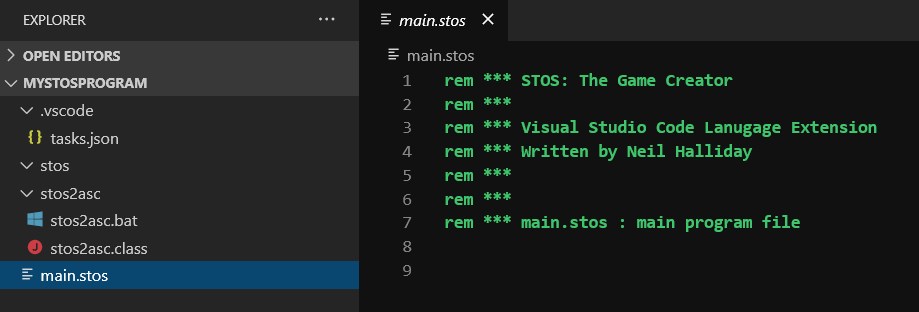
main.stos
This .stos file is the default file that is created when using the STOS New command from the command palette. Feel free to rename or replace this file with whatever you want. Remember, if you change the name of this file, you will need to make the appropriate modifications to stos2asc.bat.
Useful Links
Here are some links that you may find useful to get you up and running with Visual Studio Code: