Tag - Source

S01E08 – Collision Course (Part 1)

Welcome to episode eight of our Let’s Remake Manic Miner series. In this episode, we are going to look at how we can add some collision detection to Miner Willy. This episode is going to be super long, so it will be split into multiple parts. In part one, we will discuss the concept of collision detection and how we can deal with it in STOS.

What is collision detection?

Collision detection is the computational problem of detecting the intersection of two or more objects.

Wikipedia

Ok, now that we’ve cleared that up, we can crack on… what? explain it a little more? Alright then!

When we’re talking about computer games, what it is basically saying is: How can we tell if one object in our program is overlapping (intersecting) another object in our program? In other words, colliding with each other. In our instance, objects are the different game elements, such as walls, nasties, guardians, and Miner Willy himself.

When you’re dealing with game sprites, there are various ways this can be done, and there are varying terms such as collision masks, bounding boxes, and hitboxes. I’m not going to deal with any of these elements as part of this series, so please read up on those independently. We’re going to simplify things just as Matthew Smith did with Manic Miner and check various points around our Miner Willy character to determine what he is up against. I guess you could call these hitboxes, albeit very small ones.

Hotspots

Before we look at the points at which we are going to calculate collisions, let’s have a quick discussion about hotspots. Firstly, what is a hotspot? A sprite hotspot is a point on a sprite image that defines its origin or centre of rotation. It is specified by a pair of coordinates relative to the top-left corner of the sprite. For example, a sprite hotspot of (0,0) means that the top-left pixel of the sprite is its origin, while a sprite hotspot of (16,16) means that the pixel at 16 pixels from the left and 16 pixels from the top is its origin. Sprite hotspots are useful for positioning and transforming sprites on the screen, such as moving, scaling, rotating, or flipping them.

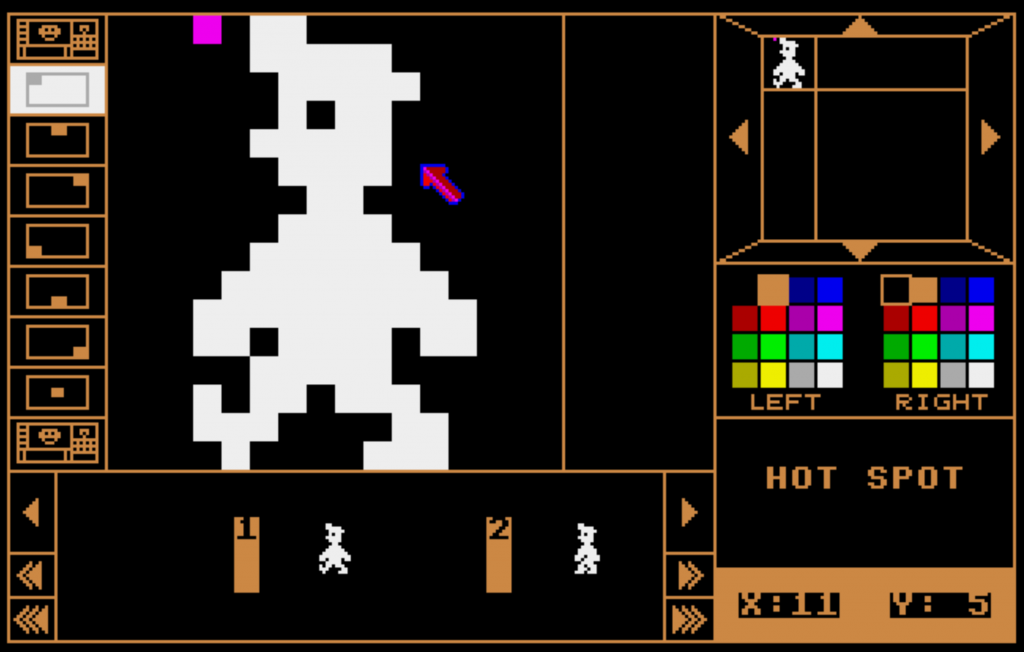
STOS provides a hotspot for its sprites, which denotes the 0,0 origin of the sprite. That is to say, if you displayed the sprite at 0,0, the hotspot is the part of the sprite that would be shown at 0,0. We can edit the hotspot of a sprite using this STOS sprite editor.

The purple square at the top left of the Miner Willy image denotes the existing hotspot. You can see with the options on the left-hand side that STOS offers a number of defaults that can be applied to your sprite. You can have a different hotspot per animation frame, which makes using the STOS collision routines easier to work with.

Our hotspot is currently at xposition 3, and yposition 0. If we were to place our sprite on the STOS screen at 0,0, it is this position that would be shown there, meaning that the top left of our sprite is actually being displayed at -3,0.

Collisions using hotspots

STOS only caters for the use of a single hotspot for it’s collision detection, and it uses a rectangular hitbox with a defined width and height. This is performed using the COLLIDE command that is available to us. However, it only detects collisions between sprites. Because of the way we are writing Manic Miner, the only sprites we will have on screen will be the guardians, as they are the only moving elements; everything else is static. We may revisit that statement later in the series when we look at the conveyor belts, but for the moment, let’s stick to it! We can’t therefore use the standard STOS COLLIDE command for this, so we will need to come up with a different way of doing it.

You can find more information about the STOS collision detection on page 94 of the STOS user manual.

Irregular-shape collision

We could look at using the DETECT command within STOS to allow us to detect the pixel colour that is under our hotspot and then execute our collision code depending on what we find. This method has merit; however, it has a number of drawbacks. Firstly, the DETECT command is ridiculously slow! Do we even need to discuss other drawbacks now? There is, for me, an even bigger drawback. It will literally grab the colour of the pixel under the hotspot. So if your game has some form of background or map, then that is going to be returned if your sprite is over it. It would have been a much better command if you could specify a different memory area other than the main screen. That’s where The Missing Link / Misty extension POINT command comes in handy because you can make an image-based collision map as a separate screen image and read data from that.

You can find more information about the STOS DETECT command on page 97 of the user manual.

Collision maps

For Manic Miner, we’re going to use the concept of a collision map, but what is that? Collision maps can come in two forms, but they essentially perform the same task; they represent shapes that will be used for collision checking. Let’s generate both types of collision maps for the Central Cavern level.

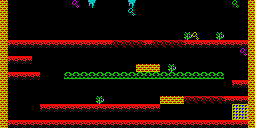
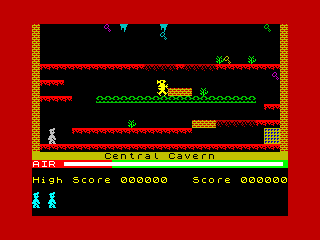
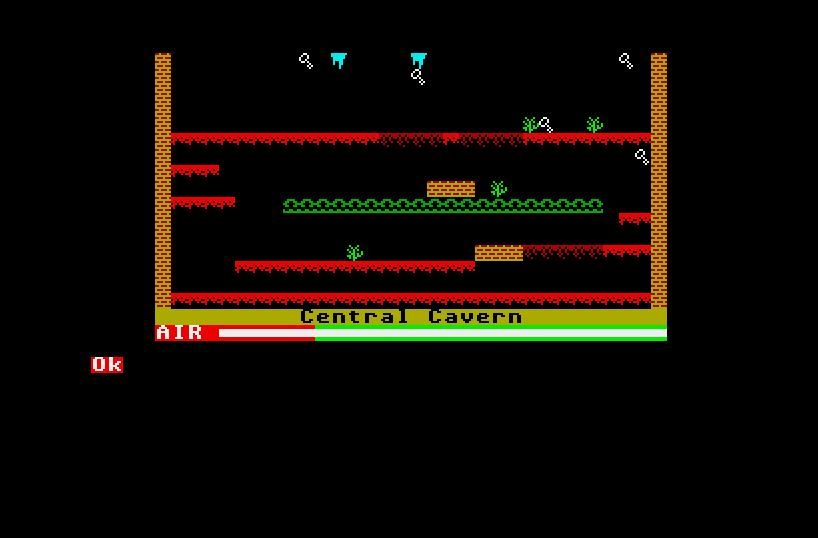
This is what our level looks like without the sprites on it.

Image-based collision map

The first type of collision map is an image-based one. This means that an image is used to define the collision rules for areas of the screen. This is where The Missing Link / Misty extension POINT command would be used. To convert the above map into an image-based collision map, we simply replace the coloured elements of the map with something that means something to us. For example, we set all the walls to colour 1, all the floors to colour 2, etc. That way, when the POINT command is used, we know how to deal with the returned value that we get.

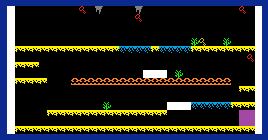
This is an example of how our image may look after we have done that conversion. I’ve added a dark blue border to highlight the white sides of the image.

What we can see here is that we have removed all colour detail from the image. Sure, it’s only the yellow and red of the bricks and the detail from the portal, but hopefully you get the idea. What we could now do is use this image for reading points under Miner Willy and then, depending on the colour we get back, act appropriately. For example, if Miner Willy hits a yellow pixel, we know that he’s hit the floor and can therefore stop falling. If he hits a green pixel, we know he has collided with the cactus, which will make him lose his life.

Tile-based collision map

So what’s the difference between an image-based collision map and a tile-based collision map? Rather than using a picture and colours, we reference a table that holds the number of the map tile that is under our character. We can then use that to decide how Miner Willy reacts. For example, if he hits a wall tile, we can stop him from walking.

There are commands in The Missing Link / Misty that deal with what tile is at what coordinates within its WORLD command mapping functions. But, alas, we are using raw STOS, and this is not an option for us.

You’ll remember from episode 6 where we actually built our level, and we used data statements to hold which tiles to show where on the map. Well, that’s our tile map, and it’s the method we are going to use for our game.

But what we are going to do is simplify it so that we don’t have to keep checking loads and loads of different values all the time – the fewer IF/THEN statements we need to do, the better. Wouldn’t it be wonderful if STOS had a case statement? Sigh.

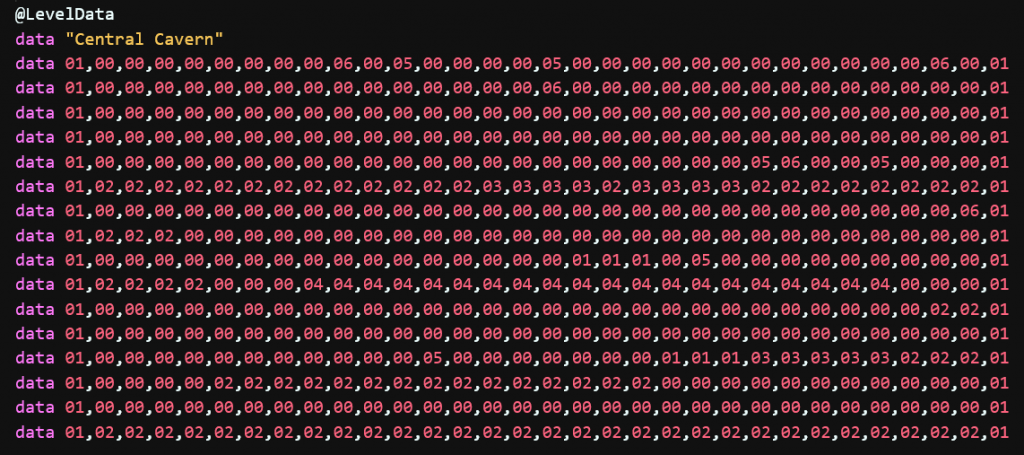
What we will do is simplify the map to identifiable elements rather than sprite numbers. Much like we did with the colours, but this time identifying the type of tile that is at the coordinate. Each level in Manic Miner has eight different tile elements that can be used within the screen, so this means we can really simplify our collision map. Happy days!

#Description
0Represents a transparent area on the screen. So where we see a zero, it means there is no tile present.
1Represents a solid wall tile that Miner Willy cannot walk or jump through
2Represents a standard, solid floor tile that Miner Willy stands on. He can jump through it, but he cannot fall through it.
3Represents a crumbling floor tile. These are the tiles that slowly disappear the longer that Miner Willy stands on them.
4Represents a conveyor belt. When Miner Willy stands on one of these tiles, he will automatically move in the direction that the belt is rotating.
5Represents a nasty such as a cactus. When Miner Willy hits these, he will lose a life.
6Represents a collectable item, such as a key.
7An actionable object, such as the switches that are used in later levels of the game.

So all we need to do is transpose the data we created in episode six into the tile representations above. Let’s add the tile map to our source code and read it into memory, ready for usage.

We’ll modify our @NewGame function so that we’re not constantly loading and reading the level information. We’ll add a new @InitLevel function so that we can handle the loading of the image and the reading of the map data.

@NewGame
    LVL = 1 : LIVES = 3 : GAMEOVER = false
    gosub @InitLevel   

    // Level loop
    repeat
        gosub @InitMinerWilly
        LVLDONE = false : MWDEAD = false

        // Gameplay loop
        repeat
            gosub @ReadJoystick
            gosub @DisplayMinerWilly
            gosub @WaitVBL
        until LVLDON or MWDEAD

        if MWDEAD then dec LIVES : GAMEOVER = (LIVES = 0)
        if LVLDONE then inc LVL : gosub @InitLevel
    until GAMEOVER
    return

@InitLevel
    LVL$ = str$(LVL) - " " : if len(LVL$) = 1 then LVL$ = "0" + LVL$
    load "LEVEL" + LVL$ + ".PI1",10
    screen copy 10 to physic : screen copy 10 to back
    return

Now let’s add the relevant code to read the tile map into memory from the data statements.

Firstly, at the beginning of the code, we will define some room for the tilemap. We’ll do this using an array.

erase 10 : reserve as screen 10

// Create some memory for the tile map data (32x16 tiles)
dim map(511)

gosub @LoadAssets

Could we create a bigger array? For sure, we could create an array that represents each x and y pixel on the screen to hold what tile is at that pixel to save having to convert to tile position, thus saving CPU time. But that takes memory (it would take 64k in fact), and we want to keep this game as lean as possible. So we are going to have to sacrifice a little speed for memory.

Add the following code to the @InitLevel function

@InitLevel
    restore
    read LVLNAME$
    
    for t = 0 to 511
        read TNO
        map(t) = TNO
    next t

    LVL$ = str$(LVL) - " " : if len(LVL$) = 1 then LVL$ = "0" + LVL$
    load "LEVEL" + LVL$ + ".PI1",10
    screen copy 10 to physic : screen copy 10 to back

    return

Here we are simply reading the tile number in one large stream. We need to remember that there are 32 tiles going across the screen and 16 tiles going down.

I think that is probably enough for this part of episode 8. In the next episode, we will use the map data and add the code necessary to stop Miner Willy from walking through walls.

Until then… Happy STOSing.

S01E07 – Environmental Concerns

Welcome to episode seven of our Let’s Remake Manic Miner series. In a shorter episode for today, we are going to get back into our main source file and take a look at some environmental concerns. That is, we are going to turn our attention to the environment in which we are going to place Miner Willy.

Before We Begin

In our last episode, we created a simple program that used our Manic Miner sprite bank and saved a representation of the Central Cavern level as a Degas format screen. We will need to load that image into our game in order to make Miner Willy feel at home. One of the things that we need to remember is that we are creating a game engine, so I think we should start adding some elements to respect that. We’ll need to make some adjustments to our main game loop first. In fact, we need to build an entire new loop so that we can control the loading of level information and set up each level before the main game loop starts. We’ll also set up some placeholder subroutines to handle things like the main menu.

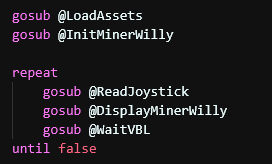
The above shows what our main game loop looked like previously. What we are going to do is change that drastically so that we have some game logic executed. Remove the code and replace it with the following:

gosub @LoadAssets
gosub @MainMenu
end

Let’s add a new subroutine to deal with the main menu. We’re not going to do anything here for the time being other than create this as a spaceholder that then calls our main game loop.

@MainMenu
    QUIT = false
    repeat
        gosub @NewGame
    until QUIT
    return
CommandDescription
QUIT = falseHere we are defining a new boolean variable called QUIT. We are setting it’s initial state to be false and will use this variable to determine whether to quit the main menu. Quitting the main menu will exit the loop and end the program.
REPEAT
GOSUB @NewGame
UNTIL QUIT
As we’re not actually coding a menu at the moment, we’ll simply call a new subroutine and start a new game. Ultimately we will do “stuff” in this menu loop and only call @NewGame when the option to start a new game has been selected by the player.

Notice how we don’t do UNTIL (QUIT = true)? That’s because (if you remember earlier episodes) everything evaluates to true or false. By specifying QUIT = true, we would effectively be saying UNTIL (true = true) or UNTIL (false = true). We replace this check with the QUIT variable instead, which gives us UNTIL true or UNTIL false. When Quit is false, then the statement does not equate to true, and the loop is repeated.
RETURNAs we know, it returns us to the line of code that called the GOSUB instruction.

We now need to create the @NewGame subroutine to deal with the main game play. This is where we will see more changes as we prepare our game engine for various game play elements such as finishing a level, Miner Willy being killed by falling too far, or hitting an obstacle or baddie.

@NewGame
    LVL = 1 : LIVES = 3 : GAMEOVER = false

    // Level loop
    repeat
        gosub @InitMinerWilly
        LVLDONE = false : MWDEAD = false

        // Gameplay loop
        repeat
            gosub @ReadJoystick
            gosub @DisplayMinerWilly
            gosub @WaitVBL
        until LVLDONE or MWDEAD

        if MWDEAD then dec LIVES : GAMEOVER = (LIVES = 0)
        if LVLDONE then inc LVL
    until GAMEOVER
    return
InstructionDescription
LVL = 1We introduce a new variable, LVL, to hold the current level that we are playing. Because this is a newly initialised game, we set the level to 1.

We could employ a cheat at some point too that allows us to start at a different level number. That would come in handy when testing further level structures.
LIVES = 3We introduce the LIVES variable to hold the number of lives that we have left.

We start with three lives, and each time Miner Willy dies, we decrease the number of lives we have.
GAMEOVER = falseOur final new variable holds whether it’s game over or not.

This works hand in hand with the LIVES variable, and when that reaches zero, we set GAMEOVER to true.
REPEATNow that we have initialised our new variables, we enter what I call the level loop. It is within this loop that we prepare the environment, load the level graphics, and reset Miner Willy to his starting positions.
GOSUB @InitMinerWillyThis is our call to the @InitMinerWilly subroutine that we previously had earlier in the code. We’ve moved it within this loop to make sure Miner Willy is initialised each time a level starts. We can do this here as one of the features of Manic Miner is that when Miner Willy dies, the whole level is reset back to the beginning.
LVLDONE = falseWe introduce the LVLDONE variable. This is used to determine if the level is done or not.

Initially, the level is not done because we need to complete it.
MWDEAD = falseThis variable holds whether Miner Willy is dead. It will be set when we collide with something that we shouldn’t or fall too far.
REPEAT
GOSUB @ReadJoystick
GOSUB @DisplayMinerWilly
GOSUB @WaitVBL
UNTIL LVLDONE OR MWDEAD
This is the same game loop that we had before; we’ve just moved it’s location.

We’ve also changed the UNTIL false to be UNTIL LVLDONE OR MWDEAD, which allows us to set either of these variables to break out of the game loop.
IF MWDEAD THEN DEC LIVES : GAMEOVER = (LIVES = 0)Once we are outside the game loop, we then check the MWDEAD variable to see if the reason we dropped out of the loop was because Miner Willy died. If so, we use the DEC instruction to decrease the value of the LIVES variable, and then we set the GAMEOVER variable by evaluating whether LIVES = 0.

Remembering that all expressions evaluate to true or false, GAMEOVER = (LIVES = 0) is the same as saying IF LIVES = 0 THEN GAMEOVER = true. We have therefore achieved the same result without having to perform additional costly calculations.
IF LVLDONE THEN INC LVLIf we have quit the game loop because the level has been completed, we increase LVL so that next time the game loop triggers, we will be on the next level.
UNTIL GAMEOVERKeep executing the repeat loop until the GAMEOVER flag has been set to true.

You can give this code a run, but it will just look the same as it did before. Miner Willy will still be able to walk and jump, but at least we have everything safely wrapped up in our menu, level, and game play loops now, with the appropriate breaks defined and used.

The Level Graphic

We’ve got our nice graphic for our level, so let’s add that to the equation and implement the code that will load the image and display it in our level loop before the main game loop starts. To do this, we are going to employ the use of a STOS memory bank. In STOS, screen memory banks come in two different flavours: a screen or a datascreen.

Screens are temporary memory banks that are predefined at the correct size for holding an ST screen, no matter what the resolution. When the program has finished running, the memory used for the screen is released, and the memory bank is deleted. This means you have to always reserve the memory bank and load your assets into it during the operation of your program.

Datascreens are the same as screen banks; however, they are permanent, and when the program finishes executing, the memory bank remains in memory and is available to be used again. You can load assets into a datascreen from the STOS command line rather than as code within your program.

We are going to use a screen because we want to use as little memory as possible, and we will load our level images as we require them. Add the following line of code at the beginning of the program.

key off : curs off : click off : flash off : mode 0 : hide on : auto back off : anim off : synchro off
palette $000,$777,$005,$007,$500,$700,$504,$707,$050,$070,$055,$077,$550,$770,$555,$777
erase 10 : reserve as screen 10
InstructionDescription
ERASE 10Here we are erasing any databank that we may already have defined within bank 10 of STOS.

This call is actually redundant at this point as the program has only just executed, and in theory there should be no memory banks defined at all. However, I’m always in the habit of erasing memory banks, and it really makes no difference; it just makes me feel better.
RESERVE AS SCREEN 10This is the instruction that signals to STOS that we want to create a temporary memory bank to hold ST screen data.

We’ve specified that we want this bank to be allocated to the memory bank 10 slot.

Once the above has been executed, we now have enough memory space allocated to load our level. We do this in our level loop by adding the following code:

repeat
        load "LEVEL01.PI1",10
        screen copy 10 to physic : screen copy 10 to back

        gosub @InitMinerWilly
        LVLDONE = false : MWDEAD = false
InstructionDescription
LOAD “LEVEL01.PI1”,10The LOAD command does just that; it loads our named asset “LEVEL01.PI1” and places it into memory bank 10. Because we are using known bank numbers and known file formats, STOS will handle all of this for us.
SCREEN COPY 10 TO physicThe SCREEN COPY instruction in STOS has many different forms. Here we are using quite possibly the simplest variation that copies an entire screen of data from one memory address to the other (bank 10 to the physical screen).
SCREEN COPY 10 TO backThe same as above, but this time we are copying the image to the background screen.

We do this because STOS automatically saves the background, and if we don’t, when Miner Willy walks over the landscape, it will be blanked out. Try it and see what happens.

You can run that now and see what the results are. We should have an environment that doesn’t get overwritten when Miner Willy moves around it.

Finally, let’s make the level loading a little more dynamic. Rather than having the hard-coded “LEVEL01.PI1” image load, let’s calculate the filename based on the LVL variable. This could be done in a number of ways, but we’ll just do it in a simple way that shows some of the string manipulation instructions in STOS.

Update the LOAD “LEVEL01.PI1” line of code to the following:

LVL$ = str$(LVL) - " " : if len(LVL$) = 1 then LVL$ = "0" + LVL$
load "LEVEL" + LVL$ + ".PI1",10
InstructionDescription
LVL$ = STR$(LVL) – ” “The STR$ instruction converts a number into a text string. After this call, LVL$ holds the current level as a text string.

One thing to note, though, is that STOS always adds a leading space to any number that it converts to a text string. Therefore, with our LVL set to 1, the resulting string is ” 1″.

We can then simply subtract spaces from the string by using – ” “.

Nice!
IF LEN(LVL$) = 1 THEN LVL$ = “0” + LVL$Here we are just checking if the resulting string is only 1 character in length.

If so, we are adding a 0 to the front of it to pad anything less than 10 to be 01, 02, 03, etc.
LOAD “LEVEL” + LVL$ + “.PI1”,10Finally, we construct the full filename by adding all the elements together and load the image into screen bank 10.

Ok, that’s all we’ve got time for today folks – I said it was going to be a shorter one! As always, the source files can be found in the GitHub repository.

In our next episode, we will start to look at how to add some basic collision detection so Willy can be stopped from walking off the screen and falling into oblivion. Until then… Happy STOSing.

S01E06 – Levelling Up

Welcome to episode six of our Let’s Remake Manic Miner series. Today we are going to take a little bit of a break from our Manic Miner main code and instead look at how we can go about creating a level for Miner Willy to walk around in; in particular, level 1 – Central Cavern.

So, without further ado, let’s get into it…

Central Cavern

Central Cavern is the first level of Manic Miner, and it introduces a number of the required skills that need to be mastered throughout the rest of the game. We have keys to collect, an enemy to avoid, obstacles to jump over, dissolving floors to navigate, and an exit portal to get back to. Pretty much everything we will get on all the other levels, with the exception of some of the levels that also employ levers.

Decoding the Level

Before jumping straight in to creating the level, let’s breakdown what is going on in Central Cavern; this will give us a better understanding of what we need to achieve to replicate this in STOS.

Gameplay Area

Each level within Manic Miner is exactly the same size. If we take a look in detail at Central Cavern, we can see that the game blocks are all 8×8 pixels. We learnt early on in the series about the ZX Spectrums graphics processing, and so this really isn’t to be unexpected, but this does pose a problem for us within STOS – more on this later. Using the screen above, we can roughly estimate the number of 8×8 tiles that make up the screen.

Knowing that the ZX Spectrum screen resolution is 256×192, we can calculate this very easily. 256 pixels divided by 8 gives us 32 sections of 8 pixels going across the screen horizontally. We can test this theory out using the text that is displayed on the screen. Let’s count them…

“High[space]Score[space]000000[space][space][space]Score[space]000000” = 32 characters.

How do we know there are three spaces in the middle of the text? Simply put, we can look at the “Cav” bit of the word “Caven”, and that shows us the three characters. Happy days! We can confidently say there are 32 tiles horizontally across the screen.

Now we just need to confirm the number of vertical tiles. Well, we’ll just have to count them to get our number, but again, it’s straight-forward. After counting them up, I deduced that, in total, there are 16 tiles vertically. We therefore now know that our game play area, or “map,” is 32×16 tiles that are 8×8 pixels in size. In terms of pixels, that is 256×128.

We can also see that both the far left and far right of the level are nothing but walls in order to keep Miner Willy from running off the screen.

Underneath the main area are the name of the level, the air supply, scores, and the number of lives remaining. I suppose these days you would call this a HUD or status bar. We can calculate the height of the status information by simply subtracting the 128 game map size from the 192 pixels that we know the screen is in height. This gives us a status bar of 64 pixels, or 8 characters. Let’s count them to make sure…

  • Name of the level = 8 pixels (1 character)
  • Air Supply = 8 pixels
  • Blank Space = 8 pixels
  • Scores = 8 pixels
  • Blank Space = 8 pixels
  • Miner Willy pixels 0 to 7 = 8 pixels
  • Miner Willy pixels 8 to 15 = 8 pixels
  • Blank Space = 8 pixels

There we are: 64 pixels, or 8 characters.

We’ve successfully determined how the level is formatted, and we can apply that logic across all the levels because they are all the same.

Recreating in STOS

It should be easy to recreate this in STOS, yes? Well, not quite!

Whenever you are looking at a tile type system on the ST, you’re pretty much limited to 16 pixels. And we learned early on in this series that STOS uses a minimum sprite width of 16 pixels too—what a bummer!

We could make a tile set that has 16 pixels using different combinations, but that would result in a crazy amount of sprites, and as we know, sprites take memory, so if we want to limit the amount of memory we are using, that is out of the question. Using a tile set is simply not an option because of the 16-pixel limitation, so what can we do?

Well, not to put too fine a point on it, we’re going to have to do this manually and create our map from sprites. We know that we can place sprites at any x position offset, meaning we can use our 8×8 sprite images without a problem. But STOS has a limit of 15 sprites on screen at one time, and in any case, displaying that amount of sprites without overloading the CPU and destroying our frame rate is simply not possible. Therefore, we need to create an image of the level, but how do we go about that?

Luckily, STOS has this nice little command called PUT SPRITE, which is listed on page 97 of the user manual in the section entitled “Exceeding the 15 sprite limit”. It reads like this:

Exceeding the 15 sprite limit

If you’ve ever seen games like Galaxians or Space Invaders you will probably consider the 15 sprite limit to be pretty restrictive. Fortunately, although you are confined to 15 moving sprites, it’s easy enough to produce the illusion of dozens of actual sprites on the screen.

You can do this with judicious use of a part of STOS Basic commands called PUT SPRITE and GET SPRITE. These allow you to create a number of copies of a sprite at one, and then just grab the one you wish to actually move around, as and when you need them. You can add animations to these fake sprites using the SCREEN COPY and SCREEN SWAP functions.

– STOS Basic User Manual, Page 97.

Simply put, the PUT SPRITE command essentially stamps the image of the specified sprite on the screen permanently, meaning we can splat (or in the words of Jon Stock – “podge” – I like this word!) them where we want, and build up our level image in the process. We can then save the resulting image as a PI1 for use in our game. Yes, the image will take roughly 32kb, but ultimately we can compress those down, and because of the colour usage, they will shrink pretty small!

Let’s Start a New Program

As mentioned earlier, we are not going to be heading into our main game source code in this episode, so let’s create a new source file and we will work with that. To begin with, we can copy some of the code from our main game in order to make things quicker to get up and running.

rem *** Manic Miner - STOS Basic Recreation
rem *** Level Creation Tool
rem ***
rem *** Written by Neil Halliday / STOS Coders
rem ***
rem *** main.stos : main program file

key off : curs off : click off : flash off : mode 0 : hide on : auto back off : anim off : synchro off
palette $000,$777,$005,$007,$500,$700,$504,$707,$050,$070,$055,$077,$550,$770,$555,$777
SXOFFSET = 32 : SYOFFSET = 0
gosub @LoadAssets
end

@LoadAssets
    erase 1 : load "MANIC.MBK",1
    return

I’m not going to explain the above code, as we’ve already been through that, so check out a previous episode for further reading about what that is doing. Let’s just say it sets up our screen, our palette, and loads our sprites.

Level Data

When working with tile sets such as those in TOME or as provided for in the WORLD command in Missing Link, we generally have some form of nice visual editor that goes with them—well, when I say nice, let’s just say functional!

Effectively, though, all those programs actually do is build a tile list which is a series of data values that represents the number of tiles that need to be displayed at a particular part of the map. Depending on what your preferred tile/map system is, it could be a byte of data that represents each tile or a word (2 bytes) of data. If you work within a byte of data, that allows you to represent values 0 to 255 per byte and therefore restricts you to 256 different tile images within your map. If you work with two bytes per tile, then you can represent values 0 to 65,535; but of course, your map data takes twice the space.

This data would normally be stored within a databank in STOS. We could do the same; however, we are going to keep things simple in our game for now and just use an array like we have seen before. An array is essentially the same as a databank in that it’s data in memory; we just access it differently. We’ll get to this bit in our next episode, so for now we are just going to set the data and read it without storing it.

But how do we set up this data? Well, it’s quite simple, really. We use the RESTORE command along with the DATA and READ commands.

RESTORE

This instruction changes the line number at which a subsequent READ operation will expect to find the next DATA statement.

– STOS Basic User Manual, Page 226/227.

DATA

The DATA statement allows you to incorporate lists of useful data directly inside a Basic program. This data can be loaded into a variable using the READ instruction.

– STOS Basic User Manual, Page 225/226.

READ

READ allows you to input some data stored in a DATA statement into a list of variables. It starts off with the first data statement in the program, and then reads each subsequent item of data in turn. As you might expect, the variable used in each READ instruction must always be of the same type as the information stored in the current DATA statement.

– STOS Basic User Manual, Page 226.

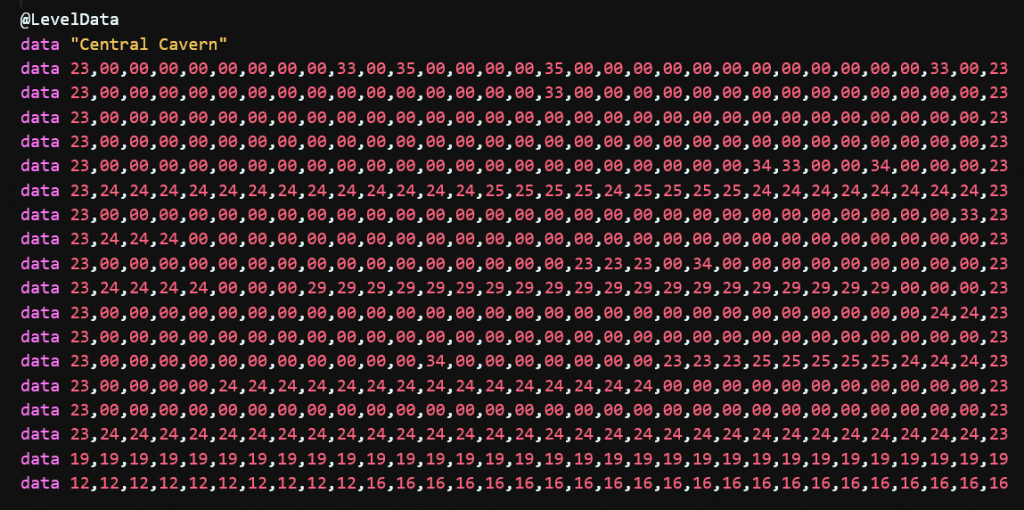
So what are we going to store in our data? The answer to that is quite easy too; we’re simply going to hold the tile numbers that we need to display on the screen to make our level look correct. In our case, our tile numbers will also be the sprite/image number from our sprite bank. That makes things nice and easy. We’re also going to hold some other information that saves us time and CPU usage when we come to use our game map.

So, let’s create our data statements to hold our level data.

@LevelData
data "Central Cavern"
data 23,00,00,00,00,00,00,00,00,33,00,35,00,00,00,00,35,00,00,00,00,00,00,00,00,00,00,00,00,33,00,23
data 23,00,00,00,00,00,00,00,00,00,00,00,00,00,00,00,33,00,00,00,00,00,00,00,00,00,00,00,00,00,00,23
data 23,00,00,00,00,00,00,00,00,00,00,00,00,00,00,00,00,00,00,00,00,00,00,00,00,00,00,00,00,00,00,23
data 23,00,00,00,00,00,00,00,00,00,00,00,00,00,00,00,00,00,00,00,00,00,00,34,33,00,00,34,00,00,00,23
data 23,24,24,24,24,24,24,24,24,24,24,24,24,24,25,25,25,25,24,25,25,25,25,24,24,24,24,24,24,24,24,23
data 23,00,00,00,00,00,00,00,00,00,00,00,00,00,00,00,00,00,00,00,00,00,00,00,00,00,00,00,00,00,33,23
data 23,24,24,24,00,00,00,00,00,00,00,00,00,00,00,00,00,00,00,00,00,00,00,00,00,00,00,00,00,00,00,23
data 23,00,00,00,00,00,00,00,00,00,00,00,00,00,00,00,00,23,23,23,00,34,00,00,00,00,00,00,00,00,00,23
data 23,24,24,24,24,00,00,00,29,29,29,29,29,29,29,29,29,29,29,29,29,29,29,29,29,29,29,29,00,00,00,23
data 23,00,00,00,00,00,00,00,00,00,00,00,00,00,00,00,00,00,00,00,00,00,00,00,00,00,00,00,00,24,24,23
data 23,00,00,00,00,00,00,00,00,00,00,00,00,00,00,00,00,00,00,00,00,00,00,00,00,00,00,00,00,00,00,23
data 23,00,00,00,00,00,00,00,00,00,00,00,34,00,00,00,00,00,00,00,23,23,23,25,25,25,25,25,24,24,24,23
data 23,00,00,00,00,24,24,24,24,24,24,24,24,24,24,24,24,24,24,24,00,00,00,00,00,00,00,00,00,00,00,23
data 23,00,00,00,00,00,00,00,00,00,00,00,00,00,00,00,00,00,00,00,00,00,00,00,00,00,00,00,00,00,00,23
data 23,24,24,24,24,24,24,24,24,24,24,24,24,24,24,24,24,24,24,24,24,24,24,24,24,24,24,24,24,24,24,23
data 19,19,19,19,19,19,19,19,19,19,19,19,19,19,19,19,19,19,19,19,19,19,19,19,19,19,19,19,19,19,19,19
data 12,12,12,12,12,12,12,12,12,12,16,16,16,16,16,16,16,16,16,16,16,16,16,16,16,16,16,16,16,16,16,16

As you can see, it looks a little meaningless in this form, but it does represent the layout of Central Cavern – honest! It also looks a bit messy in the code section above, but it will all look much better in the VS Code environment once you have it in there.

You’ll also notice that I’m including the name of the level in there too. That will become clear soon enough.

Generating the Level

Now that our data is entered into STOS, we can start to use it. So we need to put in place the code that reads the data, starting at the top left of the screen, working our way across the screen for 32 tiles, and then down to the next line until we reach the bottom of the screen. We will do this with a simple FOR/NEXT loop. Let’s create our code to do that.

@MakeLevel
    restore
    read levnm$
    for ypos = 0 to 17 : for xpos = 0 to 31 
        txpos = (xpos * 8) + SXOFFSET
        typos = (ypos * 8) + SYOFFSET
        read spn : if spn > 0 then sprite 1,txpos,typos,spn : put sprite 1 : wait vbl
    next xpos : next ypos

    paper 12 : pen 0 : locate 0,16 : centre levnm$
    paper 5 : pen 15 : locate 4,17 : print "AIR"
    ink 15 : bar 64,138 to 287,141
    return

Let’s explain what is going on here, shall we?

CommandDescription
RESTOREAs per the explanation above, what we are doing here is telling STOS to restore a particular DATA statement so we can begin reading our data. Normally what we would do here is specify the line number, but while I was writing this tutorial, I noticed that there was a slight bug in the VS Code transpiler to STOS in which it translates the line number exactly to the label. When this happens, the RESTORE command fails as the line contains the label text and not data. Oooopsy! I will get that fixed in the near future.

Anyway, by not specifying a line number, it resets STOS to expecting the first DATA statement, which in our case works in our favour!
READ levnm$This command reads the first bit of data; in our case, it is the name of the level. Because we specify this as a string, STOS will read the content of the data held within quotation marks as the entire string. In the background, STOS will be null-terminating the string, and so we effectively read a stream of data until that null value is reached.
FOR ypos = 0 TO 17 : FOR xpos = 0 TO 31We’ve seen FOR/NEXT loops already, so I’m not going to go into the details here on this one. We’re reading 18 lines of y position data and 32 blocks of x position data. These loops allow us to start at the top left of the screen, working our way across and down, starting from the left again when a new line is reached.
txpos = (xpos * 8) + SXOFFSETHere we are creating a temporary x position on the screen by using the xpos variable, multiplying it by 8 to get the appropriate pixel position, and then adding the SXOFFSET variable that we previously created in order to centre the ZX Spectrum screen on the ST.
typos = (ypos * 8) + SYOFFSETWe do the same for the y position.
READ spnNow we read the sprite number (spn) from the data set. This will also move the data pointer to the next value within the DATA instruction.
IF spn > 0 THENWe only want to do the next set of commands when spn is greater than zero. Zero represents when there is no sprite, and therefore is just a transparent background.
SPRITE 1,txpos,typos,spnWe’ve already seen the SPRITE command in use when we are displaying Miner Willy. So this is just the same, and instead of changing the animation frame of Willy, we’re changing the animation frame to that of the tile we want to display.
PUT SPRITE 1Now we tell STOS to put, splat (or podge) the sprite 1 image onto the background. Thus stamping into the screen.
WAIT VBLInteresting. Why are we using a WAIT VBL command at the end of all this? Well, take it out and run it to see what happens – it’s a mess!

PUT SPRITE only appears to work when using a WAIT VBL command. Presumably this is because the sprite functionality in STOS is running on an interrupt that is linked to the vertical blank (every 50th or 60th of a second depending on PAL or NTSC), and when you do things en masse like we’re doing here, it’s running quicker than the sprite interrupt.

So we put this WAIT VBL here to make sure we’re on time and the PUT SPRITE doesn’t mess up.

We could also use the UPDATE instruction; however, I still get odd results when doing this. So we’ll stick with WAIT VBL for now.
NEXT xpos : NEXT yposFinish the FOR/NEXT loop.
PAPER 12 : PEN 0 : LOCATE 0,16 : CENTRE levnm$A few little text instructions here for us to digest.

PAPER sets the background colour of the text that we want to display.

PEN sets the foreground colour of the text that we want to display.

LOCATE moves the cursor to the specified 8×8 text position on the screen based on the x position and y position specified. Here we are moving the cursor to x=0 and y=16.

CENTRE tells STOS to print the text levnm$ centred at the position last specified in the LOCATE instruction. Note that this is not a pixel-perfect centre, it is based on the 8×8 character grid.

Here we are printing the name of the level centred on the screen.
PAPER 5 : PEN 15 : LOCATE 4,17 : PRINT “AIR”As with the above, we are printing on the screen, this time at positions 4,17 and simply printing the word “AIR” starting at that location rather than centering the text.
INK 15 : BAR 64,138 to 287,141INK sets the colour that any shape drawing or plotting operation will use as it’s colour.

BAR draws a solid/filled rectangle from xpos,ypos to xpos2,ypos2, which represents the top-left and bottom-right of the rectangle.

Finally, we need to add a call to our subroutine to make the level draw.

gosub @LoadAssets
gosub @MakeLevel
end

If you run the routine now, you should get something like the following:

A nice rendition of the Central Cavern. Whoop whoop!

Hang On! Why are we drawing the air at maximum? Shouldn’t we do that during our game loop? Well, that is a very, very good question. We could do that, but remember, drawing things to the screen takes CPU time, so the idea is to draw as little information as possible per frame. If we draw a white box from X,Y to X2,Y2 every frame, that’s a lot of drawing that needs to be done, and we all know that STOS is very slow when drawing things like that. Therefore, if we draw the entire air time that is left, our game loop simply needs to draw a single 4 pixel line each time the air changes. This will be done in the appropriate colour, either green or red, moving from right to left. That is much faster than drawing a filled rectangle for each frame – yay!

Save the Level Screen

The final thing we now need to do is save the level screen so that it can be loaded into our main game loop. This bit is really easy to do:

gosub @LoadAssets
gosub @MakeLevel
save "LEVEL01.PI1",physic
end

And there we have it. We’ve generated our level map and saved it as an image so that we can use it in our main game loop.

And so, we’ve reached the end of another exciting episode of Let’s Remake Manic Miner. As always, the source files can be found in the GitHub repository.

In our next episode, we will start to look at how to integrate our environment into our main game loop. Until then… Happy STOSing.

S01E05 – Might As Well Jump

Welcome to episode five of our Let’s Remake Manic Miner series. Today we are going to look at making Miner Willy move around the Y axis of the screen. So, in the immortal words of Eddie Van Halen… Might as well jump! Cue cheesy music video, big hair, and flamboyant costumes… Oh, what the hell, here’s a link on YouTube so you can listen while you read!

What is Jumping?

It may seem obvious to you and me, but what actually is jumping? According to Wikipedia…

Jumping or leaping is a form of locomotion or movement in which an organism or non-living (e.g., robotic) mechanical system propels itself through the air along a ballistic trajectory. 

https://en.wikipedia.org/wiki/Jumping

But what does that mean in terms of a game? Well, it’s really dependent on what you are trying to achieve. Looking at the definition above, we can pick out a few words to look at:

Locomotion, movement, propels are all basically the same thing: some form of movement.

Air… hmm, so we know we’re moving through air, but when we’re not jumping, we’re not moving through the air. Does it mean, therefore, that we just stop and float? Of course not; there is that little thing called gravity, that invisible force that causes mutual attraction between all things that have mass. We know about it, but a game doesn’t. But what does gravity do? Simply put, it constantly pulls us down towards the ground until we reach it or land on something that cannot be pulled any further. Like when you are in the upstairs of your house, you are still being pulled towards the ground, but the floor stops you from getting there. Remove the floor, and down you go. If you want to see gravity in action, watch Felix Baumgartner!

A trajectory is essentially a path of movement, and a ballistic trajectory is the motion of an object that is moving in a gravitational field.

Few! We now know, though, that our jump is comprised of a few elements, but we can pick just the two that we need: trajectory and gravity.

Gravity

Gravity is a really easy thing to implement. Effectively, you just pull your character down (increase the Y position) by an ever-increasing amount until you reach terminal velocity. Usually, this is done using a decimal value that steadily increases over time and then gets added to your Y position. To represent this, we need two variables: SPEED and GRAVITY. We constantly increase SPEED by GRAVITY and then add SPEED to our YPOS, thus moving the character down the screen. If we hit the ground or an immovable object of some form, the SPEED variable is reset to zero, ready for the process to start again. A simple jump can then be created by setting the SPEED variable to a negative number to create upward velocity.

You can learn more about jump mechanics in this great YouTube video. It’s not in English, but the subtitles are great, and it does explain jump mechanics very well.

So let’s implement this into our game, shall we? No, we’re not going to do that! It was really interesting to learn how jumping works, but this is not what Manic Miner does. But at least you know how to implement jumping for your other projects!

Manic Miner Jumping

The way Miner Willy jumps is far more prescriptive than the process we described above. When Willy jumps, he travels a predetermined path and keeps going until he hits something or lands on something, in which case he stops. If Willy completes his jump (i.e., his ending vertical position is the same as his starting position), he then falls in a straight line until he hits the ground.

While he is jumping, he cannot change direction, and he cannot jump again. Once you’re jumping, that’s it—you better hope you did it right! Of course, this is one of the skills required to play Manic Miner.

The Jump Parabola

We learned above about the ballistic trajectory, but how would we go about creating something like that without the technique described at the beginning of this episode? The answer is quite simple and quite cheaty, but because of the movement of Miner Willy, it works perfectly for us. We will use a sine wave. Not all of a sine wave, just 180 degrees of a sine wave, which creates an appropriate parabola to work with. To make things easier, though, we will define a full 360-degree sine wave. Let’s add the following code:

@InitMinerWilly
    dim mwan(319) : for xpos=0 to 319 : mwan(xpos) = 1 + ((xpos mod 8)/2) : next xpos
    dim jmps(359) : for ang = 0 to 359 : jmps(ang) = -(sin(rad(ang))*20) : next ang
    MWD = 0 : MWWS = 1 : MWWC = 2 : MWWCC = MWWC : MWXPOS = 16 : MWYPOS = 80
    gosub @SetOFS
    return

There is not much further to explain here, as we have been through for/next loops and arrays, but what about the sin and rad commands?

CommandDescription
SinCalculates the sin of an angle, returning a floating point number as a result.
RadConverts angles expressed in degrees into radians. A radian is approximately 57 degrees.

Now we need to make sure that we adjust Miner Willy’s Y position on the screen by the jump. But, before we can do that, we need to be able to identify the state that Willy is in (hopefully not the state that we find our hero in at the beginning of Jet Set Willy!). Let’s talk a little bit about finite state machines.

What is a Finite State Machine?

This will likely be a new concept for a lot of people, but it’s really very simple. It is a mechanism for allowing something to be in exactly one of an infinite number of different states at any given time. This model can be used for many different types of applications, but it is massively used within gaming, particularly in instance-based languages such as Games Maker Studio from YoYo. They are used, amongst many other things, for indicating the state of a character—what it is currently doing.

Examples of this could be idle, walking, shooting, flying, or, in our case, jumping.

So what we can do is create a series of variables to capture Willy’s state.

@InitMinerWilly
    FALLING = 1 : JUMPING = 2
    dim mwan(319) : for xpos=0 to 319 : mwan(xpos) = 1 + ((xpos mod 8)/2) : next xpos
    dim jmps(359) : for ang = 0 to 359 : jmps(ang) = -(sin(rad(ang))*20) : next ang
    MWD = 0 : MWWS = 1 : MWWC = 2 : MWWCC = MWWC : MWXPOS = 16 : MWYPOS = 80 : MWSTATE = FALLING : MWJMPANG = 0 : MWVSPD = 0
    gosub @SetOFS
    return

We’ve defined two variables, FALLING and JUMPING, which have different values. We’ve then created a new Miner Willy variable, MWSTATE (Miner Willy State), so we can determine what our hero is currently doing. By default, because of the effect of gravity, we say that the default state of Miner Willy is falling.

Finally, we’ve created MWJMPANG (Miner Willy Jump Angle) so we know at what position in the jmps Miner Willy is currently in, and finally MWVSPD (Miner Willy Vertical Speed) so we can ultimately make Willy drop to the floor (this is simulating our gravity, if you like). We’ll use this later on, but it’s better to get the definition out of the way.

We’ve got our different states, and we’ve assigned the default to Willy. Our next task is to actually make Willy jump. This happens when the fire button on the joystick is pressed, so we need to make a small amendment to our joystick routine, but there is also some setup that we need to do, such as signaling that Willy is jumping, etc. Let’s create a new subroutine first.

@StartJump
    MWSTATE = JUMPING : MWJMPANG = 2 : MWVSPD = 0
    return

As you can see, we are setting MWSTATE to be JUMPING, setting our current jump angle (MWJMPANG) to be 2, and resetting the vertical speed (MWVSPD) so that we are not moving vertically – We’ll explain that later on!

Let’s read the joystick fire button and call the @StartJump subroutine.

@ReadJoystick
    JL = jleft : JR = jright : JF = fire : JSTCK = (JL or JR)
    if JF then gosub @StartJump
    if not(JSTCK) then MWSPD = 0 : else MWSPD = MWWS : if JL then MWD = -1 : gosub @SetOFS : else MWD = 0 : gosub @SetOFS
    return

Nothing is going to happen if we run our routine now, because we are not using any of the new variables we have just created. So let’s affect Miner Willy with our jump logic.

@DisplayMinerWilly
    if MWSTATE = FALLING then MWVSPD = 1 : else MWVSPD = 0 : MWJMPANG = MWJMPANG + 2 : MWSTATE = JUMPING : if MWJMPANG > 180 then gosub @ResetJump
    if MWD = 0 then MWXPOS = MWXPOS + MWSPD : else MWXPOS = MWXPOS - MWSPD
    sprite 1,MWXPOS,MWYPOS,mwan(MWXPOS) + MWOFS
    return

We’re saying here that if Miner Willy is FALLING, then his vertical speed (MWVSPD) is 1, so as to move him down the screen. else, we set his vertical speed to 0, increase the jump angle by 2, and set his state to JUMPING. We then check MWJMPANG and if it has reached 180 degrees, we call the @ResetJump subroutine to stop Willy from jumping.

The @ResetJump subroutine looks like the following:

@ResetJump
    MWSTATE = FALLING : MWJMPANG = 0
    return

In this routine, we simply reset Miner Willy’s state to FALLING and clear the MWJMPANG.

Finally, we can use all of the above to affect the Y position of our hero:

@DisplayMinerWilly
    if MWSTATE = FALLING then MWVSPD = 1 : A = MWYPOS : else MWVSPD = 0 : A = MWYPOS + jms(MWJMPANG) : MWJMPANG = MWJMPANG + 2 : MWSTATE = JUMPING : if MWJMPANG > 180 then gosub @ResetJump
    if MWD = 0 then MWXPOS = MWXPOS + MWSPD : else MWXPOS = MWXPOS - MWSPD
    sprite 1,MWXPOS,A,mwan(MWXPOS) + MWOFS
    return

So, you can give that a run, and you will see that Miner Willy now jumps when we press the fire button. BUT… and it’s a big but… You can press fire again while Willy is jumping, and it all goes wonky. Not only that, but you can change directions! Argh! Don’t panic; it’s easily solved. We can just use our state engine on the joystick input routine and bypass some stuff—whoop!

@ReadJoystick
    if MWSTATE = JUMPING then goto @EndReadJoystick
    JL = jleft : JR = jright : JF = fire : JSTCK = (JL or JR)
    if JF then gosub @StartJump
    if not(JSTCK) then MWSPD = 0 : else MWSPD = MWWS : if JL then MWD = -1 : gosub @SetOFS : else MWD = 0 : gosub @SetOFS
@EndReadJoystick
    return

So, what we are doing here is essentially saying: If Miner Willy is jumping, then I don’t want to read the joystick any more and change our speed or jumping variables, so just goto the @EndReadJoystick label instead. Once you’ve jumped, you’d better hope that it was the right jump to make.

Let’s Apply Gravity

We’ve not done anything with our gravity as of yet, so we can do that now. Remember, gravity continuously pulls an object down, so it’s really very simple to implement. Let’s create a new subroutine to apply gravity to our MWYPOS.

@ApplyGravity
    MWYPOS = MWYPOS + MWVSPD
    if MWYPOS > 80 then MWYPOS = 80
    return

Literally, all we are doing here is adding Miner Willy’s vertical speed to his Y position. By doing it this way, we can simply change the value of MWVSPD to 0 when he hits something. I’ve put a quick if statement in there on the MWYPOS variable just so that we can stop Willy from falling off the bottom of the screen. We’ll remove that once we get a background and some collision detection in place.

All that is left is to apply the gravity:

@DisplayMinerWilly
    gosub @ApplyGravity
    if MWSTATE = FALLING then MWVSPD = 1 : A = MWYPOS : else MWVSPD = 0 : A = MWYPOS + jmps(MWJMPANG) : MWJMPANG = MWJMPANG + 2 : MWSTATE = JUMPING : if MWJMPANG > 180 then gosub @ResetJump
    if MWD = 0 then MWXPOS = MWXPOS + MWSPD : else MWXPOS = MWXPOS - MWSPD
    sprite 1,MWXPOS,A,mwan(MWXPOS) + MWOFS
    return

And there we go! Miner Willy walks and jumps now! Yippee.

And so, we’ve reached the end of another exciting episode of Let’s Remake Manic Miner. As always, the source files can be found in the GitHub repository.

In our next episode, we will start to look at how to build an environment for Miner Willy to walk around in. Until then… Happy STOSing.

S01E04 – Animating Willy

Welcome to episode four of our Let’s Remake Manic Miner series. Today we are going to look at animating Miner Willy as he moves around the screen.

How We Normally Do It

Animating characters is usually straight-forward; in fact, you could say it’s probably one of the easiest things you can do with your sprite. Effectively, you just need to cycle around a series of images while your character is moving, and then when the character stops, you stop cycling around the image. If the character changes direction, you reset the animation frame for the start animation of the new direction.

So, let’s do that, shall we? No, we won’t do that, because that is not how Manic Miner works, it does something that I never really thought of before, but it’s quite a clever trick that Matthew Smith did, and it saves a bunch of processing time too! Let’s ask ourselves…

What Would Matthew Smith Do?

I’ve spent long hours looking at how Miner Willy is animated, and it had me puzzled for a while. I tried various different things, but I could just not get it to look right. After a bit of a break and doing some other things and thinking, my mind came to a simple conclusion: Willy’s animation frame is tied to his X position on the screen. This is why he keeps animating when jumping, and also why, no matter how you’ve moved about on the screen previously, you always end up with the same frame of animation when Miner Willy is in the same position.

You can try this out for yourself by playing the Central Cavern level and walking left to the brick wall. Miner Willy will stop mid-walk and not animate any further. Move around the screen, jump, do random things—when you walk back to the left, the frame of animation is always the same! Try some other things too, such as walking off the first platform. Miner Willy will always be in exactly the same frame of animation. If we were to use the standard method as described above, this would most certainly not be the case. Therefore, his animation frame is tied to his X position!

Now, this sounds like a bit of a cop-out, but in fact, it’s absolute genius! If you base the character’s animation frame on their current X position, there are no complex animation calculations such as counting frames or resetting when you change direction—none of that! Therefore, you are saving lots of CPU instructions and making your game run faster, which, when working with something like the ZX Spectrum, the more you can squeeze out of the CPU, the better. So, when I say genius, that’s exactly what it is.

How Do We Do This In STOS?

So, how do we replicate this within STOS?  Well, it’s pretty simple, really; we just define an array that holds the correct animation frame to show at the different horizontal positions on the screen. We know that our Miner Willy sprite has just four frames of animation, and we know that sprite #1 is walking to the left. Therefore, our Miner Willy sprites are as follows:

Frame NumberDescription
1Miner Willy walking left – Frame 1
2Miner Willy walking left – Frame 2
3Miner Willy walking left – Frame 3
4Miner Willy walking left – Frame 4
5Miner Willy walking right – Frame 1
6Miner Willy walking right – Frame 2
7Miner Willy walking right – Frame 3
8Miner Willy walking right – Frame 4

So, what we can do is predefine which frames to use and store them in an array so that we don’t have to be calculating which frames to be using all the time. We can then use the direction variable (MWD) to adjust the frame accordingly by an offset. The fewer calculations we have to perform per frame, the quicker our game logic will run.

Let’s modify our initialisation routine so that we precalculate the frames that represent each X position on the screen.

@InitMinerWilly
    dim mwan(319) : for xpos=0 to 319 : mwan(xpos) = 1 + ((xpos mod 8)/2) : next xpos
    MWD = 0 : MWWS = 1 : MWWC = 2 : MWWCC = MWWC : MWXPOS = 16 : MWYPOS = 80
    return

We’ve introduced some new commands there, so let’s walk through them and determine what they are doing.

CommandDescription
dim mwan(319)Here we are setting up array MWAN (Miner Willy ANimation) and we are telling it that we want enough storage to hold 320 values. When defining arrays in STOS the first value is always 0, so in the instruction here we are defining values 0 to 319, so, 320 spaces.

But what is an array? Think of an array as a list of values that can be accessed by an index number. In our case we have said we want 320 indexed values to be stored. If we tried to store any more, STOS would generate an error message as in affect, we would be overwriting other memory.

Arrays can be single or multi-dimensional, but we won’t get into that just yet. Our example here is a single dimensional array.
for xpos=0 to 319Here we are starting a for/next loop that is going to generate values between 0 and 319 within the XPOS variable. This value represents the number of pixels across the screen.
mwan(xpos) =We are addressing our array here, and passing the XPOS variable as the value index, this accessing indexes 0 to 319.
1 + ((xpos mod 8)/2)We’re doing a little bit of mathematics here on on our XPOS value, and introduced the MOD command. MOD returns the modulus of a value, that is to say it’s used to divide two numbers and only return the remainder. In this instance we are dividing XPOS by 8 and returning the remainder.

But why are we doing this? Well, the XPOS value as we know will always be increasing in value from 0 to 319. By using the MOD command, we can ensure that we always get a calculated value of between 0 and 7, no matter what the value of XPOS is.

We then divide that value by 2, which results in a value of 0 to 3.

We add 1 to that result so we end up with a value of 1 to 4 – or an animation number – whoop!
next xposHere we are simply finishing off the for/next loop. All instructions between the for and the next will be executed the number of times specified in the for command.

Our MWAN array now contains the appropriate animation frame to use based on the X position on the screen. We now need to update our sprite command to make sure we are using the appropriate frame.

@DisplayMinerWilly
    if MWD = 0 then MWXPOS = MWXPOS + MWSPD : else MWXPOS = MWXPOS - MWSPD
    sprite 1,MWXPOS,MWYPOS,mwan(MWXPOS)
    return

Let’s build and run our project to see what we have. If you move your joystick left/right now, you should see Miner Willy walk – look at him go! But, one major draw back, he’s always facing to the left. That’s because our frames of animation we have calculated only register frames 1 to 4. We need a way to make him face to the right. Remember that MWD variable we created previously? That’s where this comes in, because we can now use that to create an offset to point to the correct animation frame.

We could do some complex mathematics here to transform the frame number to the right place, but complex maths means more processor time, so let’s just keep it simple and quick instead. We will create an offset flag that holds a number that needs to be added to the frame. If Willy is walking to the left, then the offset will be 0. If Willy is walking to the right, then the offset will be 4. When we add this offset to the animation frame number, Willy will be facing in the correct direction. Ok, so let’s make a few code changes:

Firstly, we create a new subroutine called @SetOFS, this is what we will use to set what our frame offset should be, using the MWOFS (Miner Willy OFSet) variable.

@SetOFS
    if MWD = 0 then MWOFS = 4 : else MWOFS = 0
    return

next, we need to call this new subroutine from a couple of places.

@InitMinerWilly
    dim mwan(319) : for xpos=0 to 319 : mwan(xpos) = 1 + ((xpos mod 8)/2) : next xpos
    MWD = 0 : MWWS = 1 : MWWC = 2 : MWWCC = MWWC : MWXPOS = 16 : MWYPOS = 80
    gosub @SetOFS
    return
@ReadJoystick
    JL = jleft : JR = jright : JF = fire : JSTCK = (JL or JR)
    if not(JSTCK) then MWSPD = 0 : else MWSPD = MWWS : if JL then MWD = -1 : gosub @SetOFS : else MWD = 0 : gosub @SetOFS
    return

As you can see on the second section of code, we are calculating the new offset when MWD changes.

And finally, we now need to utilise the offset on the Miner Willy sprite.

@DisplayMinerWilly
    if MWD = 0 then MWXPOS = MWXPOS + MWSPD : else MWXPOS = MWXPOS - MWSPD
    sprite 1,MWXPOS,MWYPOS,mwan(MWXPOS) + MWOFS
    return

Let’s build our project and see what we have. Success! Miner Willy is walking in the direction he is facing. Well, he’s running actually, so we will need to slow that down a little bit, but we can tackle that later.

For now, that’s the end of this episode. Check in for the next episode where we will be making Willy jump. Remember, you can find the various episode source codes and assets on the Manic Miner Github page.

S01E03 – Making Willy Walk

Displaying Miner Willy

So, we want to make Miner Willy move then? Well, we can’t do that unless he’s shown on the screen. In our previous episode, we created our game loop, and so we need to make an adjustment to that loop in order to call our display routine for Miner Willy.

repeat
    gosub @DisplayMinerWilly
    gosub @WaitVBL
until false

For our subroutine, we will keep it simple for the moment and just place Miner Willy at a specific location on our screen.

@DisplayMinerWilly
    sprite 1,100,100,1
    return

We have already learned about the label and the return command in previous episodes, but what else are we doing here? We’ve introduced a new command:

CommandDescription
sprite 1,100,100,1This is the official definition of the sprite command as written in the STOS manual:

SPRITE n,x,y,p
Displays sprite number "n" on the screen at coordinates "x" and "y".

"n" is the number of the sprite, which can range from 1 to 15. It is this number that will be used to identify the sprite in any subsequent calls to the MOVE and the ANIM instructions.

"x" and "y" are the coordinates of the point on the screen where the sprite is to be drawn. Unlike normal screen coordinates, these can take NEGATIVE values. The "x" coordinate can vary from -640 to +1280, and the "y" coordinate from -400 to +800. This allows you to move a sprite off the screen without causing an error.

"p" specifies which of the images in bank 1 is to be used for a particular sprite. The only limit to the number of these images is the amount of available memory.

Each sprite has an invisible handle through which it can be manipulated, called a "Hot Spot". Whenever we draw a sprite, we always specify its coordinates in terms of the position of this point on the screen. As a default, the hot spot is always set to the top left-hand corner of the image, but this can readily be changed using a special option from the sprite definer accessory.


Phew! There is quite a bit to take in there, but essentially what it is saying is that we have a total of 15 sprites that STOS can deal with. When we create a sprite, we have to tell STOS which number of the 15 sprites we are creating: “n”, as it calls it in the manual. We have assigned sprite number 1 to Miner Willy.

Next, we are specifying where to show Miner Willy on the screen—his x and y coordinates. We have just chosen to show Miner Willy at 100,100 on the screen.

Finally, we specify which of the images we want to show—in other words, which of the image numbers from the sprite bank we have loaded. We are using 1 here, which is Miner Willy facing left.

Let’s transpile our program, load it into STOS, and run it. We should simply get Miner Willy, frame 1, at position 100,100 on the screen. It works! But now we need to make him move.

A Moving Willy

We need to define some form of mechanism to make Miner Willy move. In the ZX Spectrum version of Manic Miner, this was done purely with keyboard input. We could do the same for our game, but for ease, I’ve decided to use the joystick to control our hero. We therefore need to read some input from the joystick, which STOS has some handy routines to deal with.

Before we can do anything in terms of joystick input, we need to do some setup so we can control the position of Miner Willy. We always need to know his current x and y positions on the screen so that we can increment them as required for walking and jumping. We need to do this in a series of variables, which we will need to initialise before trying to display Miner Willy. There’s also some additional setup that we will do too but won’t use for the moment; this is to cater for the fact that we are not going to use either the sprite movement or animation routines that are built into STOS.

Let’s create a new subroutine for initialising everything we need for Willy.

@InitMinerWilly
        MWD = 0 : MWWS = 1 : MWWC = 2 : MWWCC = MWWC : MWXPOS = 16 : MWYPOS = 80 : MWSPD = 0

There are a fair few variables there! I’ve tried to use logical naming conventions for them, but let’s go through them one by one and describe what they are used for:

VariableDescription
MWDMiner Willy Direction

Will be used to identify the direction that Miner Willy is currently facing. MWD with a value of 0 will mean that Willy is facing to the right, and -1 will mean he is facing to the left. We use 0 and -1 for a reason, which will become clear later on.
MWWSMiner Willy Walk Speed

This value will be used to identify the number of pixels that Miner Willy will move with each frame of animation when walking.
MWWCMiner Willy Walk Counter

This value is an interesting one. Miner Willy is only a small chap and doesn’t walk very fast. If we were to move and animate him a single pixel every 50th of a second, he would be running the 100-metre dash across the screen. So we need to slow him down a little bit. This is where the walk-counter comes in. Let me explain a bit:

When the joystick is pushed to the right, we move Willy to the right by the number of pixels as defined by MWWS and change his animation frame. If this is happening at 50 frames per second, then it would take 6 seconds for Willy to cross the entire screen, and the animation frames 1-4 would happen 12 times in just a single second—it would be super fast.

Therefore, to slow him down, we need to introduce a counter. We can use this to control the speed by decrementing the counter and then only moving and animating when it reaches zero. At which point we reset the counter back to its maximum value. MWWC holds the default value of the counter that can be used to change the speed and reset our main counter (see below).
MWWCCMiner Willy Walk Counter Current

This is the current value of the walk counter. This value is decreased at each VBL, and when it reaches zero, we will update Miner Willy’s position and current animation frame. We then reset this value back to the default setting (MWWC) for it to happen all over again.
MWXPOSMiner Willy X POSition

Holds Miner Willy’s current X position on the screen. It is this value that is increased to move him to the right and decreased to move him to the left. We’re giving him a default X position of 16 to start with.
MWYPOSMiner Willy Y POSition

Holds Miner Willy’s current Y position on the screen. It is this value that is increased to move him down the screen and decreased to move him up. We’re giving him a default Y position of 80 to start with.
MWSPDMiner Willy SPeeD

We will use this variable to hold the current speed that Miner Willy is moving horizontally. More about this later.

We now need to make a call to our initialisation routine and also update our sprite command so that we are not forcing Willy to always be at position 100,100 on the screen. So we do that after we have loaded our assets. We may need to move this later on, but it serves it’s purpose here for the moment.

gosub @LoadAssets
gosub @InitMinerWilly

Now, we need to update our sprite command so that we are using the newly created MWXPOS and MWYPOS variables.

@DisplayMinerWilly
    sprite 1,MWXPOS,MWYPOS,1
    return

OK, let’s transpile our program, load it into STOS, and see what we have. You should now see that Miner Willy has moved positions. He’s further to the left and higher up the screen. That means that our sprite positioning with MWXPOS and MWYPOS is working, and we can begin to manipulate those with the joystick input.

Joystick Input

To get Miner Willy to move, we need to read the joystick data stream. STOS provides joystick input commands, so we will use them. Let’s go ahead and create a new function that we can call whenever we want to read the joystick.

@ReadJoystick
    JL = jleft : JR = jright : JF = fire : JSTCK = (JL or JR)
    return

Let’s breakdown the calls that are being used:

CommandDescription
JL = jleftHere we are reading the value of the jleft command and storing it in our variable JL. If the player is pushing the joystick left, then JL will be TRUE, otherwise, it will be FALSE.
JR = jrightAs with the jleft command, we are reading if the player is pushing the joystick to the right. Again, TRUE or FALSE will be returned into JR.
JF = fireYou guessed it, we’re reading the status of the fire button. JF will be TRUE if fire is being pressed, and FALSE if not. We are going to use fire to ultimately make Miner Willy perform a jump.
JSTCK = (JL or JR)This is an interesting one. What we are doing here is creating a third variable that identifies if the joystick is being pushed either left (JL) or right (JR). The variable JSTCK will therefore contain TRUE if we are pushing the joystick in any horizontal direction. With this variable set, we can then start to perform operations that should only be performed when Miner Willy is moving.

The above is simple enough, but why are we storing the state of the joysticks in variables? Well, we do this for a couple of reasons. Essentially, the input from the joystick is a continual stream of data being thrown at STOS. If we used the direct joystick commands throughout our source code, we could end up with some strange results as the joystick states may be different whilst our code is executing. For example, making Miner Willy do something at a point in which he shouldn’t be doing it. In addition to this, we would force STOS to perform additional reads and therefore consume more processor time at each call. By storing the values within variables, we only read the joystick once per VBL and therefore save a bunch of processing power.

Now we need to make sure that we call the routine to get the values from the joystick. We must do this within the game loop, so add the following code:

repeat 
    gosub @ReadJoystick 
    gosub @DisplayMinerWilly 
    gosub @WaitVBL 
until false

Applying Movement to Willy

We’ve got Miner Willy all set up now, and we have our variables available for changing his X and Y positions on the screen. We’ve also started to feed joystick input into our JL, JR and JF variables. Now that we’ve got that in place, we need to make Miner Willy move. Earlier, we created the MWSPD variable to hold the current speed at which Miner Willy is walking. It is this variable that we manipulate in order to signal that movement is to occur. We do this within the @ReadJoystick section of code.

@ReadJoystick
    JL = jleft : JR = jright : JF = fire : JSTCK = (JL or JR)
    if not(JSTCK) then MWSPD = 0 : else MWSPD = MWWS : if JL then MWD = -1 : else MWD = 0
    return

Let’s break down that new line of code that we have just added in:

CommandDescription
if not(JSTCK)What we are doing here is testing that the JSTCK variable is set to FALSE. This could be done in a couple of ways. I have chosen to use “not”, which inverses the content of the variable. If you remember earlier in the series we spoke about how all conditions return TRUE or FALSE. Well, that what this does, if the value of JSTCK is FALSE the “not” command inverts it and therefore the tested condition is TRUE, and vice-versa if JSTCK was TRUE.

We could also have done if JSTCK = false and again, that creates a condition that returns TRUE or FALSE.

Hope that makes sense!
then MWSPD = 0If JSTCK is FALSE, then we set the current speed of Miner Willy to zero. There is no input on the joystick, and therefore Miner Willy is not moving and his movement speed is zero.
else The else clause of the if statement tells us what to do when the if condition does not equate to TRUE. Here we are saying, if JSTCK is TRUE (i.e. we have joystick input), then we need to execute the following code.
MWSPD = MWWSWe set the current walking speed of Miner Willy to the default walking speed that has been defined.
if JL then MWD = -1Is the joystick being pushed to the left? If so, then set the walking direction (MWD) to be -1.
else MWD = 0Else, the joystick must be pushed to the right, so set the walking direction to 0. We can make this assumption here as the initial check on the JSTCK variable told us that either left or right was being pushed. Therefore, if it’s not left (JL) as per the if check, then it can’t be anything but being pushed to the right.

We now know in which direction Miner Willy is facing (MWD) and at what speed he is moving (MWSPD). This information can now be used to update the MWXPOS variable accordingly. We’ll add this code into the @DisplayMinerWilly section.

@DisplayMinerWilly
    if MWD = 0 then MWXPOS = MWXPOS + MWSPD : else MWXPOS = MWXPOS - MWSPD
    sprite 1,MWXPOS,MWYPOS,1
    return
CommandDescription
if MWD = 0 thenFirstly, we check the direction that Miner Willy is facing, remember, 0 is to the right and -1 is to the left.
MWXPOS = MWXPOS + MWSPDMWD does equal zero, so add the current speed to Miner Willy’s X position. In other words, increase the X position, thus moving him to the right.
else MWXPOS = MWXPOS – MWSPDMWD does not equal zero, so subtract the current speed from Miner Willy’s X position, thus moving him to the left.

Transpile the code and see what happens. You should have a Miner Willy that now moves left and right on the screen using the joystick.

That’s all for this episode, folks. In the next episode, we will look at animating Miner Willy using a very interesting technique!

In the meantime, you can find the various episode source codes and assets on the Manic Miner Github page.

S01E02 – Setting Up

For me, making sure our code is structured correctly is an important part of programming. STOS is a very unstructured language; it doesn’t have any kind of function or procedure that we can create to make stand-alone “black box” routines. As a result of this, every variable that is created is global in scope; in other words, if you define a variable, ALL of your program can access that variable.

One of the reasons I created the VS Code STOS extension was to bring at least a little bit of structure to the code structure of STOS. Of course, this is only applicable when viewing the code within the VS Code environment. Once the code is output in the STOS format, it’s pretty ugly, but we really don’t need to worry about that. We can also annotate our code better within VS Code by using the non-transferred comments that only exist in our code editor, and not the final STOS basic file.

So, what we will try to do during this series is create as clean a code set as we can, with lots of comments to explain what is going on for you lovely people that are reading. Hopefully, this will enable you to take the code and do something else with it. I don’t mind what you do with it, but please don’t just distribute it and call it your own. Make sure you create something new and exciting, and all I ask is that you give me a little credit—that’s all.

In this section, we will just do some simple preparations for our main program code. Nothing clever, just the usual housekeeping that we need to do for a STOS program to run how we want.

Creating our Project

This is a simple enough process. Using the command pallet within VS Code, use the function called STOS: The Game Creator: STOS New. This will launch a series of questions about your new STOS project and where to save it on your computer. You can follow detailed instructions on how to do this on the overview page.

Once you’ve got your project created, you will have your main.stos file, which is the main program file that we will be using to write our code.

You will also need to create an area somewhere that either STOS on your ST or your emulator has access to. This is where you will need to copy the project assets and, ultimately, your build.asc file so you can test it out.

Setup Code

When you start a new STOS project in VS Code, you get the initial comments section at the top of the code, just as a reminder that it was me that created the program. So we’re going to remove that and add our first comments as a description of what the project is.

rem *** Manic Miner - STOS Basic Recreation
rem ***
rem *** Written by Neil Halliday / STOS Coders
rem *** June 2023
rem ***
rem *** main.stos : main program file 

So what’s going on there?  Well, the rem command is short for “remark” – in other words, it’s a comment. Having rem on a line of code means that everything after that command is regarded as just a comment and is not any kind of executed code. Even if you had valid code after the rem, it would still be treated as a comment until the next line.

The rem command is a valid STOS command, and is transferred to our final STOS program code, and will be visible within the listing within STOS. We will also be using other types of comments that will not be transferred to STOS, which will be explained later on.

Screen Setup

Now that we have our comments done, we will do some basic setup of the screen. This is to setup how STOS controls the screen and switch off some of the STOS elements that are not required when running a full-screen, low-resolution game.

key off : curs off : click off : flash off : mode 0 : hide on : auto back off : anim off : synchro off
palette $000,$777,$005,$007,$500,$700,$504,$707,$050,$070,$055,$077,$550,$770,$555,$777

Not crazy code, but let’s explain what each of the commands do.

CommandDescription
key offSwitches off the STOS menu system that is shown at the top of the screen. The one that shows you which function keys do what. The window is only really useful when using the editor, and it is always the first to go. You can switch it back on by using the key on command.
curs offIt does exactly what it says on the tin: it switches off the cursor graphic that shows where the text you are going to type appears. Again, this can be turned on using the curs on command.
click offSwitches off that horrible sound that is made when you press a key. I think this sound has to be one of the worst keyboard clicks I’ve ever heard, and I spent many years of programming in STOS with the volume down until I was running stuff. As with all the other commands, click on will switch the keyboard click back on (but why would you!?)
flash offRemoves the standard colour cycling that is performed on the colour of the cursor graphic. Even though we switched the cursor off before, the colour cycle continues, so we need to switch that off to avoid some of our graphics looking like some LSD-driven fantasy dream. You guessed it, flash on switches it back on.
mode 0Sets our screen mode to low resolution. STOS allows us to use all three of the ST screen modes. 0 = low, 1 = medium, and 2 = high resolutions; however, you cannot use mode 2 unless you are plugged into a high resolution monitor, and even then, you don’t need to because modes 0 and 1 don’t work, so it’s automatically in mode 2.
hide onMakes the mouse pointer invisible. Unfortunately, it doesn’t switch off the mouse interrupt, so moving the mouse around still slows down the running program, but at least we can’t see the arrow. There is a command in the Misty extension by Top Notch that switches the mouse interrupt off to stop that from happening. Now, you would think that you would use hide off to get the mouse pointer back? Sorry, here’s a curve ball that Francois threw us! To get the mouse pointer back, you use the show on command. With both of these commands, you can actually remove the on bit, and then it makes a bit more sense: hide and show. Choose which method you prefer, and then stick to it; neither is right nor wrong.
anim offThis makes sure that any STOS sprite animations are switched off. We won’t be using these as they are quite slow; instead, we will be doing something a little bit more interesting to make things run more quickly.
synchro offSwitches off the STOS sprite synchronisation interrupt. Anything we can switch off STOS-wise is always a good thing!

Our second line of code sets the colour palette of the screen. It is simply a list of colours in colour number order, starting with colour 0 (the background and border colour). You don’t have to specify all the colours when you call the command, but you always have to specify them in the correct order. Note: The standard palette command in STOS is not compatible with the STE, so your number ranges here have to conform to the standard ST 512 colour palette numbers ($000 to $777).

Loading Our Assets

What are assets? They are the things that we use within our program, such as sprites and sound effects. They are loaded into STOS memory banks for use during the program’s execution. Lots of programs perform data loads at different points in the game to conserve memory, but as our program is going to be super small anyway, we will just load them upfront. We’re targeting a 512kb ST for this program, so if we start to run out of memory, we can refactor this bit, but we should be fine.

To cater for any refactoring that may be required, we’ll put our loading of assets code in a separate place. We already know that we don’t have procedures within STOS, so we will do the next best thing. We will use a VS Code label and create a subroutine. Now we can call it whenever we want, from wherever we want.

It’s not a perfect way of doing this, but it’s the best we have, and it works well for my needs.

@LoadAssets
erase 1 : load "MANIC.MBK",1
return
CommandDescription
@LoadAssetsThe identifier that tells the VS Code transpiler that this is a label. As a result, during the conversion to STOS code, the line is converted to a rem line, and a record is made of the line number where it sits. A second conversion pass then happens and replaces anywhere that references the label with the appropriate line number.
erase 1If we already have something in STOS memory bank 1, it will be deleted and space cleared for our new data.
load “MANIC.MBK”,1Loads the MBK (memory bank) file into STOS bank 1. The MANIC.MBK is our STOS Sprite bank, which always resides in bank 1 of STOS.
returnReturns to the point where the call to @LoadAssets was made.

We now need to make a call to our @LoadAssets subroutine. This is done using the STOS gosub command, and we can make a call to that at the beginning of our program. So, we add the line to the top of our program after the call to the palette command.

gosub @LoadAssets

And that’s it! We’re done for now. We have our screen setup, and we have our assets loaded. If you want, you can transpile the program, load it into STOS and run it. You won’t get much out of it other than a blank screen and an “OK” at the bottom, but at least you know it’s working.

The Game Loop

Probably the single most important element of any game is it’s gameplay loop. This is the section of code that is continually executed during game play and allows us to control, well, everything. If we want to create a game that is as flexible as possible and easy to understand what is going on, I highly recommend making your game loop as simple as possible. I approach this by writing specific sections of code that perform specific game logic tasks. With a language like STOS, this can become quite messy, but using the VS Code development environment really helps us here. So, let’s create our game loop.

repeat
    gosub @WaitVBL
until false

Pretty simple right? Well, yeah it will be at this point in time, but as you can see, I’m making a call to the @WaitVBL subroutine. By using this technique, we can make our game loop very simple and add new subroutines and call them from our game loop without making things ugly in terms of code. So, what’s going on in our game loop?

CommandDescription
repeatThe repeat command forms part of a repeat/until loop, which can be simply explained as follows… “repeat this next section of code until a certain condition is met.”
gosub @WaitVBLThe gosub command tells STOS to “goto” a “subroutine” – in this case, the @WaitVBL subroutine. Normally in STOS basic, the @WaitVBL section would be a line number; but because we are working in VS Code, the transplier will automatically convert @WaitVBL in to the relevant line number for us. This makes our code much simpler to read.

Note: All subroutines must terminate with a return command so that STOS can go back to where it called it from.
until falseThis is an interesting one. Here we are specifying the condition for the loop to stop. Every condition within the basic language equates to either true or false. This could be something like (1 = 1), which equates to true; (1 = 0) would always equate to false. Because we are just using false, there is no condition; it’s just always false. Therefore, our loop will just go on forever. In STOS true is represented by the number -1, and false represented by the number 0.

We will amend this statement later in our development cycle because we will need to take into account a game-over scenario.

Now we need to put the code in place for our @WaitVBL subroutine.

@WaitVBL
screen swap : doke $ff8240,$222 : wait vbl : doke $ff8240,$000
return
CommandDescription
screen swapSwaps the addresses of the physical and logical screens. This is also called “double buffering“. The idea behind this is that you display all your graphics off screen, and when the time is right, you swap the screen to show what has just been displayed. Then, while that display is showing, you draw your new updates on the hidden screen, and again swap it to show your new display when you are done. This prevents your objects from being displayed as you are drawing them and prevents flicker on the screen. Good eh?
doke $ff8240,$222Eh? Er? What? Just what is going on here?

Well, it’s quite simple to explain. Memory address $ff8240 is where the ST reads the value that represents what colour 0 is set to (the border, or background). By doking a value (doke is when we want to store a 16-bit value, also known as a word, into a memory address) we are setting the border to $222, which is a dark grey colour. You’ll see why we do this in a second.
wait vblThis command forces STOS to wait for the next vertical blank (VBL). In other words, it stops the execution of any other code until the vertical blank returns to the top of the screen. The use of the wait vbl command is what ensures we can create a consistent speed of game play and reduce flicker.
doke $ff8240,$000As with the other doke command, we are directly setting the border colour, but this time we are setting it back to black.

So why do we change the colour of the border before and after the wait vbl command?  Well, this is a clever little trick that let’s us see how quickly our game is running. The border will be black before all our routines are called, and it will then turn grey for the amount of time that it takes for the vertical blank to return to the top of the screen. The larger the section of black, the more CPU time is being used to perform our code.

The Atari ST in low and medium resolutions run at either 50hz or 60hz depending on where you are located in the world. Therefore, the VBL returns to the top of the screen either 50 or 60 times per second. In other words, the screen redraws at 50 or 60 frames per second. Most games on the ST run at half this speed, and it’s quite rare to actually find a game that runs at full frame rate on a standard ST. Our aim is to make sure everything runs in a single VBL; however, this is particularly hard to achieve when writing programs in STOS. But let’s see what we can do. If your area flashes a lot, it’s likely you are over a single VBL, whereas if the grey colour is solid – good job, you’re running at 50/60 frames per second!

That’s All For Today

That’s all that we are going to cover in this section. Join us in episode three, where we will look at getting Miner Willy to walk and jump.

S01E01 – What is Manic Miner?

So, what is Manic Miner?  Perhaps you have been living under a rock, or perhaps you are just not old enough to remember the game that changed how we view platform games. For those who don’t know what Manic Miner is, let me explain…

Manic Miner is a platform-based game written for the ZX Spectrum by a [then] 16-year-old Matthew Smith and published by Bug-Byte in 1983. It was republished later in the same year by Software Projects, a company set up by Matthew, Alan Maton, and Colin Roach. Although Matthew worked as a freelance developer for Bug-Byte, an oversight in his contract enabled him to take Manic Miner with him when he left – ooops! There is a fantastic documentary on Matthew Smith, produced by Kim Justice, on YouTube. I highly recommend you watch it.

Inspired by Miner 2049er, which was published for the Atari 8-bit family in 1982, Manic Miner has been called one of the most influential platform games of all time. It has been ported to many home computers, consoles, and mobile devices.

To get a more full flavour of Manic Miner, check out the full walkthrough video on YouTube published by RZX Archive. You might want to turn the volume down after a few minutes to save your ears from bleeding! That said, Manic Miner was the first ZX Spectrum game to feature in-game music combined with sound effects while you played!

Game Play

You control Miner Willy as he attempts to escape from 20 different caverns by collecting various flashing items to activate the exit portal. Once the portal is activated, you must jump into it to progress to the next cavern. All this must be done before your oxygen supply runs out and while avoiding various deadly obstacles (known as nasties in the game) and enemies (guardians) that wander around the caverns along predefined paths. Once you have successfully traversed all 20 caverns, the game starts again from the beginning. Scoring is based on the items that you collect, and bonus points are awarded for the amount of remaining oxygen you have when you reach the portal. An extra life is awarded for each 10,000 points scored.

Deconstructing the Game

As with any game you want to create, you need a plan. In our instance, this process is a little easier because we already have a finished game that we can reference. But we do need to break the game down into it’s component parts so we understand what we need to do and can identify any challenges that we may experience during the programming. From this, we can plan our STOS activities and hopefully cater for any hurdles before they become problematic. There’s nothing worse than getting part way through something and realising “Oh crap! How can we deal with that?” and having to refactor a load of stuff.

Gameplay Graphics

Let’s have a look at the Manic Miner graphics and how we are going to use them.

Miner Willy

Our hero is a fairly simple single-color 16×16 sprite with a total of 4 animation frames to cover walking and jumping in one direction. What is going to be really interesting about the Miner Willy sprite is the hot spot positioning. Manic Miner has some pretty serious pixel-perfect jumps that need to be made. I hope we can replicate them appropriately.

STOS has a minimum sprite width of 16 pixels, so we match in this respect. We will therefore define Miner Willy as a 16×16 sprite, and it will take the first 8 sprites in our STOS sprite bank. Four sprites for walking to the right, and four sprites for walking to the left. There are no individual jumping sprites, as they are just the same walking sprites with a vertical movement.

His starting point in the game is usually the same, regardless of the level, which is 16,112. There are a couple of levels where this changes, but it’s not very often.

Walls and Floors

There are various wall and floor graphics throughout the game that stop Miner Willy from walking to certain places within the level; however, the common factor is that they are all 8×8 pixels and follow repeatable patterns. This makes it nice and easy for us to replicate these elements. Something that we need to note is that some floors crumble when Miner Willy stands on them for too long.

We will need to compensate for the fact that STOS can only handle a minimum of 16 pixels wide for a sprite. Not a problem, because although we are going to store these images in a sprite bank, we are going to do something whacky with them later on!

Guardians

There are two main types of guardians in Manic Miner: ones that move vertically and ones that move horizontally. Each cavern is allocated enough memory to hold eight frames of animation. What this means is that Matthew had to be clever in his guardian design. For example, if you have a sprite that is obviously facing left or right, then you can only have one guardian on the level: 4 sprites for walking left and 4 sprites for walking right. Therefore, the levels that have two guardian graphics do not have left- or right-facing sprites.

The guardians are all defined as 16×16 sprites, but in some cases, they do not fill that entire space.

If Miner Willy hits a baddie, a life is lost, and the level resets back to the beginning.

Nasties

As with the walls, all nasties are 8×8 pixels and come in the form of stalactites, stalagmites, cactus plants, and other varieties of nastiness to jump over. One touch of these obstacles, and you lose a life, and the level resets back to the beginning.

Items

For Miner Willy to progress to the next cavern, all the flashing collectable items need to be picked up. All items are 8×8 pixels, and within the game, the foreground colour attribute is rapidly switched to make them flash. We will draw these elements using colour 1, as we can apply a STOS colour cycle without affecting any of the other colours on the screen – bonus!

Exit Portals

Exit portals come in various different styles and are 16×16 in size. They have a simple inverse flash animation that makes use of the ZX Spectrum foreground and background flash functions, so we need to make sure we get the timing of this function correct. As we don’t have a flash function in STOS, we will either need to use a colour cycle or a simple inverse sprite. I’ve opted for a second sprite, as this means that we don’t have to worry about palettes or anything like that for a colour cycle.

Level Breakdown

Let’s break down the different levels that Manic Miner has. This way, we know what we have to achieve. We’ll start with “Central Cavern” (level 1) first of all, and we’ll add to this list as we progress with the episodes.

Level 1 – Central Cavern
ElementDescription
Solid FloorBright Red
Crumbling FloorDark Red
Number of Guardians1
Guardian Types1 x Yellow Trumpet Robot – L/R
Number of Items5 x Keys
NastiesBlue Stalactite
Green Cactus
Exit PortalBlue / Yellow in bottom right

Ok, I think we are about ready to start putting some code together. So check out Episode 2 to take a look at how we are going to get things setup.

Bit Plane – O – Mania

By Neil Halliday

Bit Plane – O – Mania was an unfinished demo screen that I created in October of 1993 for a STOS Mega Demo that GBP were writing called “Hellbender”. I recently rediscovered the majority of the source code on one of my many floppy disks I have stored in the attic, but there were some elements missing. I’ve spent my spare time over the last week finishing off the screen so that I can make it available for download on the site. The code is by no means perfect, and I’m sure it can be optimised more, but it works.

The screen features:

  • Single plane 32×47 horizontal scroll text
  • Single plane vertical real-time sine waver scroller
  • 4 single plane sine wave sprites
  • 2 single plane moving logos
  • Lots of rasters (approx 256 colours on screen)
  • SNDH Music by Jochen Hippel (aka Mad Max)

Included in the zip file is the main BPOM.BAS file, which is the demo and some sub directories containing the source assets and utility programs for creating the data files in the correct format.

I’d love to hear your feedback on this demo screen, so please comment below!

DOWNLOAD