Welcome to part two of episode eight of our Let’s Remake Manic Miner series. In this episode, we are going to add to the work that we did previously, and create the collision logic for Miner Willy and the cavern floors and walls.
If you haven’t already checked out part 1 of Episode 8, make sure you read through it to understand some of the code that we have in place.
Using the Collision Map
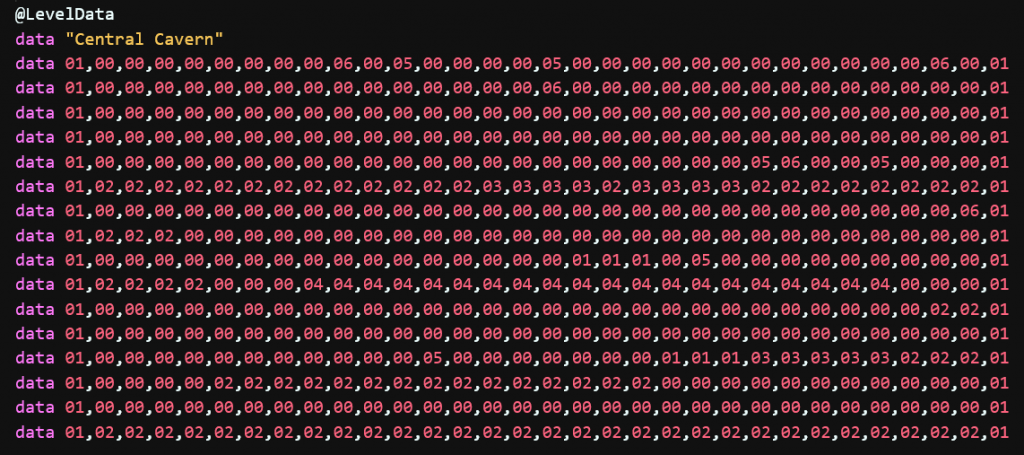
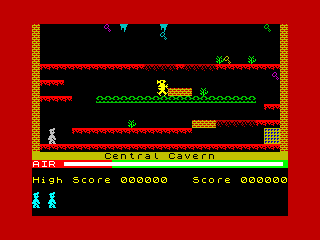
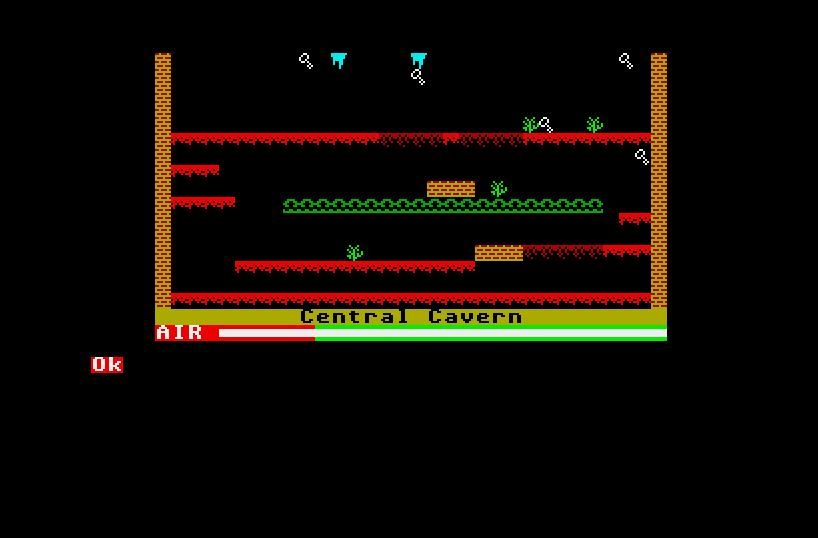
In the previous part of episode 8, we created our collision tile map. We did this by simplifying the world that Miner Willy is part of. As a result, we created the map array to hold the different tiles and their positions within the world. We are now going to start using the map array to allow us to stop Willy doing things he shouldn’t. But first of all we need to make sure that Miner Willy should always be doing, and that is falling.
All Fall Down
Put on your luminous socks, slap on some cheesy 80s music, and listen to some 5*Star while we do the next bit!
The first collision we are going to do is with the floor, but before we can start to do that, we need to make sure that Miner Willy is falling. After all, he can’t hit the floor unless he’s moving towards it. If you remember from a previous episode, we limited the Y position for Willy within the @ApplyGravity function. So, we need to remove that limitation to make sure that Willy heads towards the ground.
Find the line that reads…
if MWYPOS > 80 then MWYPOS = 80…and delete it.
If we run our code now, Miner Willy will simply fall off the bottom of our screen. If you’ve copied the code from the previous episodes, Willy is actually out of the bounds of the cavern, so before we start to check against the floor, let’s sort that out. To make our levels more flexible, let’s store Miner Willy’s starting coordinates within the level data that we’ve created.
Add the following pieces of data to the bottom of the level data…
...
data 01,00,00,00,00,00,00,00,00,00,00,00,05,00,00,00,00,00,00,00,01,01,01,03,03,03,03,03,02,02,02,01
data 01,00,00,00,00,02,02,02,02,02,02,02,02,02,02,02,02,02,02,02,00,00,00,00,00,00,00,00,00,00,00,01
data 01,00,00,00,00,00,00,00,00,00,00,00,00,00,00,00,00,00,00,00,00,00,00,00,00,00,00,00,00,00,00,01
data 01,02,02,02,02,02,02,02,02,02,02,02,02,02,02,02,02,02,02,02,02,02,02,02,02,02,02,02,02,02,02,01
data 48,80
We will use these two values for Miner Willy’s starting X position and Y position for the level. We will need to read these in when we initialise the level data, so lets do that now by adding an additional read statement within the @InitLevel function. We will use variables MWSXPOS and MWSYPOS for those values.
@InitLevel
    restore
    read LVLNAME$

    for t = 0 to 511
        read TNO
        map(t) = TNO
    next t

    read MWSXPOS, MWSYPOS

    LVL$ = str$(LVL) - " " : if len(LVL$) = 1 then LVL$ = "0" + LVL$
We then need to change our @InitMinerWilly function to use these values when Willy is initialised at the start of each level. This is straight forward as we already have our MWXPOS and MWYPOS variables that we are using, and previously we hard coded the values when Willy was reset. We simply need to change the hard coded values to use our new variables.
@InitMinerWilly
    FALLING = 1 : JUMPING = 2
    dim mwan(319) : for xpos=0 to 319 : mwan(xpos) = 1 + ((xpos mod 8)/2) : next xpos
    dim jmps(359) : for ang = 0 to 359 : jmps(ang) = -(sin(rad(ang))*20) : next ang
    MWD = 0 : MWWS = 1 : MWWC = 2 : MWWCC = MWWC : MWXPOS = MWSXPOS : MWYPOS = MWSYPOS : MWSTATE = FALLING : MWJMPANG = 0 : MWVSPD = 1
    gosub @SetOFS
    return
Ok, so if we run our game now, we will see that Willy is now within the bounds of the cavern, and as we expect, he falls straight through the floor. So, how do we stop him from doing that?
Stop Right Now, Thank You Very Much!
We’ll move to 1997 for the next bit of music whilst we read – or maybe you’ll get distracted and just watch the video instead. For those that watched the video, welcome back!
So, how do we stop Miner Willy from falling? Well, it’s really quite simple. You’ll recall we have a variable called MWVSPD this is the vertical speed that Willy is heading, so all we need to do is manipulate that value before we apply gravity to him.
In our @DisplayMinerWilly function, you’ll see that we already decided that if Willy is falling that we will reset the MWVSPD variable to one.

And, because it’s within the @ApplyGravity function where we manipulate Miner Willy’s real Y position, we know that we can fiddle with the speed and it will then be reset each frame, ready for the next check – happy days!
So, let’s start to do some checking of what is below Willy. Let’s introduce a new function called @CDetection and add it to our @DisplayMinerWilly function.
@DisplayMinerWilly

    gosub @ApplyGravity
    if MWSTATE = FALLING then MWVSPD = 1 : A = MWYPOS : else MWVSPD = 0 : A = MWYPOS + jmps(MWJMPANG) : MWJMPANG = MWJMPANG + 2 : MWSTATE = JUMPING : if MWJMPANG > 180 then gosub @ResetJump
    if MWD = 0 then MWXPOS = MWXPOS + MWSPD : else MWXPOS = MWXPOS - MWSPD
    gosub @CDetection
    sprite 1,MWXPOS,A,mwan(MWXPOS) + MWOFS
    return
@CDetection
returnWe’ve simply done a straight return there, but we’ll add to this in a second. Before we do, let’s discuss how we can speed up our collision calculations.
Whenever we’re working with calculations, whether simple like collisions, or more complex, the aim is to always reduce the number of calculations you are doing. When doing something like collisions, the calculations are pretty easy, but the thing to remember is that once a collision has happened, we know what the outcome should be; therefore, we do not need to process all the other calculations; it’s just a waste of CPU time.
We can handle this with a simple boolean variable which we can set at the start of our @CDetection function. We will call it CDETECTED, and we will set it to false.
@CDetection
    CDETECTED = false
    return
Our main detection routines can set this flag (as required) once they have encountered a collision, and we can then skip other collision calculations, thus saving CPU time each frame. Not rocket science, I know, but useful all the same.
We’ll introduce a new function for checking below Miner Willy, so let’s add that in now and call it in our @CDetection function. We only want to call the check below Miner Willy when he is heading downwards. We can identify that by checking if his state is FALLING, but, if he’s jumping, we need to only check when he has reached the peak of his jump parabola (if the angle is > 90 degrees, then he’s heading downwards). This enforces that once you’ve jumped, you’re going up regardless!
@CDetection
    CDETECTED = false
    if (MWSTATE = FALLING) or (MWJMPANG > 90) then gosub @CheckBelowMinerWilly
    return

@CheckBelowMinerWilly
    return
In fact, let’s add all the other directions too: above, left, and right.
@CDetection
    CDETECTED = false
    if (MWSTATE = FALLING) or (MWJMPANG > 90) then gosub @CheckBelowMinerWilly
    if not(CDETECTED) then gosub @CheckAboveMinerWilly
    if not(CDETECTED) then gosub @CheckLeftMinerWilly
    if not(CDETECTED) then gosub @CheckRightMinerWilly
    return

@CheckBelowMinerWilly
    return

@CheckAboveMinerWilly
    return

@CheckLeftMinerWilly
    return

@CheckRightMinerWilly
    return
Notice how we are now starting to use the CDETECTED variable. This is where we may have already encountered a collision and are therefore skipping the other calculations because they are not necessary.
We’ve now got the core structure for our collision detection routines in play. We can now add the collision code itself. We’ll check below Willy first of all, but how do we do that? Well, we use the collision map that we have in the map array. We can translate an X & Y Position on the screen, and grab the tile number from that position. We can then calculate what we need to do based on that read value – quite simple, really.
What’s Under My Willy?
Strap yourselves in; this one is a doozy! What’s under my Willy?
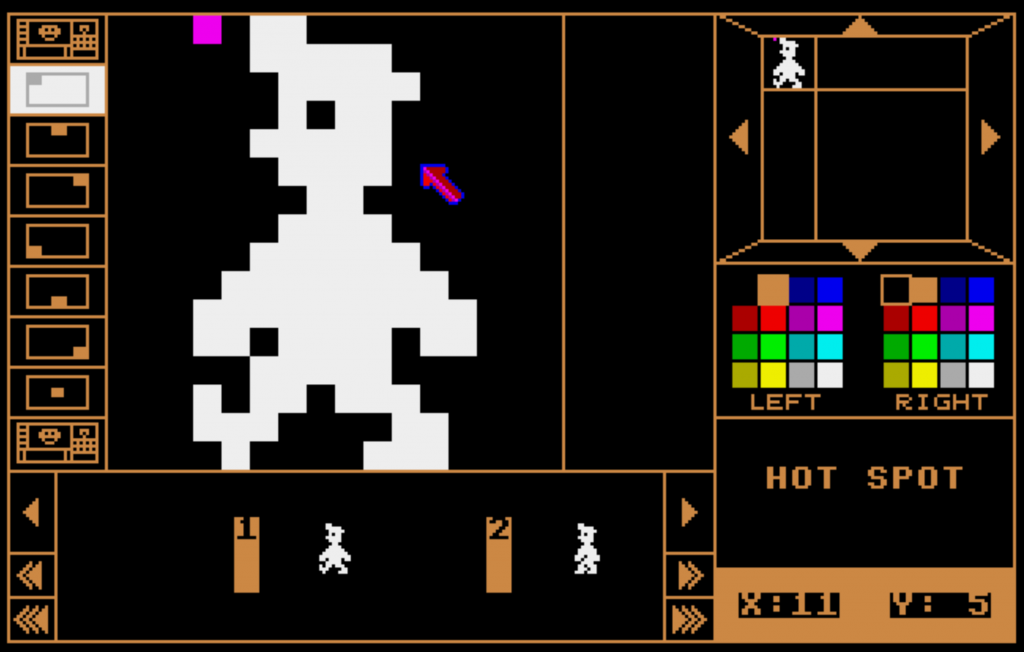
Remember those pesky hotspots that we talked about in the previous part? That’s where they would normally come in to play, however, we are going to do something a little different. One of the main features of the Manic Miner game is the pixel-perfect jumps that have to be done. If we were using a single hotspot, that would break that concept. Our hotspot is in the top left corner of Miner Willy. What we are going to do is check 3 different positions of Willy: bottom left, bottom middle, and bottom right. We’ll do this by creating three variables and grabbing the tile number at those three positions.
Neil’s Handy Hint: What I found useful while writing this text is to introduce some joystick control on the vertical axis of Miner Willy. That helps with determining the calculation positions and displaying the tile information for debugging purposes, should you need it. You could also plot some pixels in a different colour to help determine where your collision points are.
The offsets that we need to check are as follows:
Bottom Left... MWXPOS,MWYPOS+16
Bottom Middle... MWXPOS+4,MWYPOS+16
Bottom Right... MWXPOS+8,MWYPOS+16
Remember that the above calculations are going to be pixel-based, so we need to convert these into an offset that is relative to our map array. We need to do a little bit of mathematics for that to happen, and the calculation is as follows:
(XPOS – 32) / 8
Firstly, we need to take a value of 32 from the calculated X position that we want to check. This is to account for the fact that the tile map array does not start at pixel position 0. We then divide that value by 8 to convert it to 8 character blocks. In the case of the Y position, we do the same, but then multiply out the result by 32 to cater for the 32 tiles per line.
As we are going to be using the left, middle and right values in all our calculations, let’s add the calculations to our main @CDetection function so that it executes just once and we don’t have to be repeating the same calculations all the time and consuming CPU.
@CDetection
    CDETECTED = false
    MWL = MWXPOS-32 : ror 3,MWL : MWL = MWL and %00011111
    MWM = MWXPOS-28 : ror 3,MWM : MWM = MWM and %00011111
    MWR = MWXPOS-24 : ror 3,MWR : MWR = MWR and %00011111
    MWT = A : ror 3,MWT : MWT = MWT and %00001111 : rol 5,MWT
    MWB = A+16 : ror 3,MWB : MWB = MWB and %00001111 : rol 5,MWB

    if (MWSTATE = FALLING) or (MWJMPANG > 90) then gosub @CheckBelowMinerWilly
    if not(CDETECTED) then gosub @CheckAboveMinerWilly
    if not(CDETECTED) then gosub @CheckLeftMinerWilly
    if not(CDETECTED) then gosub @CheckRightMinerWilly
    return
Erm?? What the [insert expletive here] is going on there then? Well, dividing and multiplying in STOS is very very slow. So because we are working off nice round numbers, we can do super quick divides and multiplications using the ROR and ROL.
Slide to the left. Now slide to the right – It’s all a bit of a number dance!
ROR means “rotate right”. In other words, get the binary representation of a number and rotate all the bits right by x positions. Because this is a rotation, any bits that fall off the right-hand side then reappear on the left-hand side. If we were working in assembly, we would “shift” instead of rotating; in a shift operation, values that fall off the right-hand side do not appear on the left-hand side. As an example, let’s pretend we are working with the number 15, and we are working within a byte (an 8-bit number). That value is represented as such in binary: %00001111. If we rotate that value by 2, the resulting binary representation is %11000011. As you can see, the two bits at the far right of the value are now at the beginning of the number. The rightmost bits of a binary number are called the least significant bits, and the leftmost bits are called the most significant bits.
So working on the above, if we rotate a number by 3 bits, we actually divide it by 32. Or do we? Well, no, we don’t. As we have seen in the example above, the value of 15 rotated right by two bits actually results in a value of 49155. Try this small program to show that.
10 cls
20 A = 15
30 print "start: "; bin$(A)
40 ror 2,a
50 print "end: "; bin$(A)
As you can see, STOS is working with 16-bit numbers by default, and because we have rotated, our two least significant bits have now become our two most significant bits. This is why we then use the and command. What that does is a logical and on the result to mask off the values that we don’t want. In other words, we want to keep the four least significant bits, which then results in a value between 0 and 31; an 8-bit value of %11001111 therefore becomes %00001111.
The calculation for the Y position is the same. However, once we have divided our value by 8, we then multiply it by 32. This is the same technique, but to multiply, we rotate the value to the left instead. Note how in the code above, we are using the A variable. This is so we can take into account the jump parabola, with A being a relative offset from the Y position that the jump began.
Hey presto, we’ve got some good maths going on there, and using some nifty techniques, we’ve really removed a lot of processor consumption by STOS. I hope that all makes sense!
See page 220 of your STOS manual for more detailed information on what these commands do, but don’t pay too much attention to it because it misses a huge point, which is why we also have to use the and command above.
Grabbing the Tile
Thanks to all the maths that we are doing above, the values that are held in the MWx variables represent the different offsets that can be used to read the tile number from our map array. Let’s add that to our @CheckBelowMinerWilly routine so that we can start to do stuff based on the tiles below him. I’ve added a couple of prints there too, so we can see what is going on below Willy. We will remove those eventually.
@CheckBelowMinerWilly
    TBL = map(MWL + MWB)
    TBM = map(MWM + MWB)
    TBR = map(MWR + MWB)


    locate 0,0
    print "TBL=";TBL; "   "
    print "TBM=";TBM; "   "
    print "TBR=";TBR; "   "
    return
Ok, if we run this code now, we should be able to see what the tile number is below Willy’s left, middle, and right. Once we’re happy with that, we can then put the logic in to check the collision based on the tile number. In this instance, we want to check for tile number 2 (a solid floor), and if we find a tile we stop him from falling. Add the following code:
@CheckBelowMinerWilly
    TBL = map(MWL + MWB)
    TBM = map(MWM + MWB)
    TBR = map(MWR + MWB)

    if (TBL = 2) or (TBM = 2) or (TBR = 2) then MWVSPD = 0 : CDETECTED = true : MWYPOS = A : gosub @ResetJump

    locate 0,0
    print "TBL=";TBL; "   "
    print "TBM=";TBM; "   "
    print "TBR=";TBR; "   "
    return
So, if the tile below (left, middle, or right) is two, then we set Willy’s speed to be zero (ie, stop him from falling), and we flag that a collision has been detected. Finally, we set Willy’s Y position to be equal to A, which takes into account any relevant offset for a jump, and we then make sure that if Willy was jumping, that the jump is reset.
And there we have it. We are now stopping Miner Willy from falling through the floor. Well, the standard solid floor, at least!
That will probably do for this episode, so come back soon for the next episode, where we will continue to build out the collision detection on other types of tiles and also look at adding things above and to the side of Miner Willy. In the mean time, I hope you have enjoyed my ramblings on this element of collision detection, and remember that the source code is all available on my GitHub page.
Until the next time… Happy STOSing!