Tag - STOS

S01E01 – What is Manic Miner?

So, what is Manic Miner?  Perhaps you have been living under a rock, or perhaps you are just not old enough to remember the game that changed how we view platform games. For those who don’t know what Manic Miner is, let me explain…

Manic Miner is a platform-based game written for the ZX Spectrum by a [then] 16-year-old Matthew Smith and published by Bug-Byte in 1983. It was republished later in the same year by Software Projects, a company set up by Matthew, Alan Maton, and Colin Roach. Although Matthew worked as a freelance developer for Bug-Byte, an oversight in his contract enabled him to take Manic Miner with him when he left – ooops! There is a fantastic documentary on Matthew Smith, produced by Kim Justice, on YouTube. I highly recommend you watch it.

Inspired by Miner 2049er, which was published for the Atari 8-bit family in 1982, Manic Miner has been called one of the most influential platform games of all time. It has been ported to many home computers, consoles, and mobile devices.

To get a more full flavour of Manic Miner, check out the full walkthrough video on YouTube published by RZX Archive. You might want to turn the volume down after a few minutes to save your ears from bleeding! That said, Manic Miner was the first ZX Spectrum game to feature in-game music combined with sound effects while you played!

Game Play

You control Miner Willy as he attempts to escape from 20 different caverns by collecting various flashing items to activate the exit portal. Once the portal is activated, you must jump into it to progress to the next cavern. All this must be done before your oxygen supply runs out and while avoiding various deadly obstacles (known as nasties in the game) and enemies (guardians) that wander around the caverns along predefined paths. Once you have successfully traversed all 20 caverns, the game starts again from the beginning. Scoring is based on the items that you collect, and bonus points are awarded for the amount of remaining oxygen you have when you reach the portal. An extra life is awarded for each 10,000 points scored.

Deconstructing the Game

As with any game you want to create, you need a plan. In our instance, this process is a little easier because we already have a finished game that we can reference. But we do need to break the game down into it’s component parts so we understand what we need to do and can identify any challenges that we may experience during the programming. From this, we can plan our STOS activities and hopefully cater for any hurdles before they become problematic. There’s nothing worse than getting part way through something and realising “Oh crap! How can we deal with that?” and having to refactor a load of stuff.

Gameplay Graphics

Let’s have a look at the Manic Miner graphics and how we are going to use them.
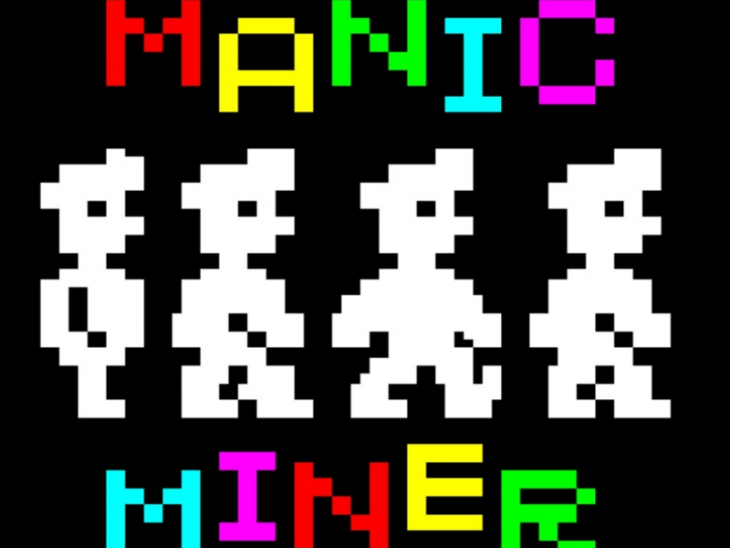
Miner Willy

Our hero is a fairly simple single-color 16×16 sprite with a total of 4 animation frames to cover walking and jumping in one direction. What is going to be really interesting about the Miner Willy sprite is the hot spot positioning. Manic Miner has some pretty serious pixel-perfect jumps that need to be made. I hope we can replicate them appropriately.

STOS has a minimum sprite width of 16 pixels, so we match in this respect. We will therefore define Miner Willy as a 16×16 sprite, and it will take the first 8 sprites in our STOS sprite bank. Four sprites for walking to the right, and four sprites for walking to the left. There are no individual jumping sprites, as they are just the same walking sprites with a vertical movement.

His starting point in the game is usually the same, regardless of the level, which is 16,112. There are a couple of levels where this changes, but it’s not very often.

Walls and Floors

There are various wall and floor graphics throughout the game that stop Miner Willy from walking to certain places within the level; however, the common factor is that they are all 8×8 pixels and follow repeatable patterns. This makes it nice and easy for us to replicate these elements. Something that we need to note is that some floors crumble when Miner Willy stands on them for too long.

We will need to compensate for the fact that STOS can only handle a minimum of 16 pixels wide for a sprite. Not a problem, because although we are going to store these images in a sprite bank, we are going to do something whacky with them later on!

Guardians

There are two main types of guardians in Manic Miner: ones that move vertically and ones that move horizontally. Each cavern is allocated enough memory to hold eight frames of animation. What this means is that Matthew had to be clever in his guardian design. For example, if you have a sprite that is obviously facing left or right, then you can only have one guardian on the level: 4 sprites for walking left and 4 sprites for walking right. Therefore, the levels that have two guardian graphics do not have left- or right-facing sprites.

The guardians are all defined as 16×16 sprites, but in some cases, they do not fill that entire space.

If Miner Willy hits a baddie, a life is lost, and the level resets back to the beginning.

Nasties

As with the walls, all nasties are 8×8 pixels and come in the form of stalactites, stalagmites, cactus plants, and other varieties of nastiness to jump over. One touch of these obstacles, and you lose a life, and the level resets back to the beginning.

Items

For Miner Willy to progress to the next cavern, all the flashing collectable items need to be picked up. All items are 8×8 pixels, and within the game, the foreground colour attribute is rapidly switched to make them flash. We will draw these elements using colour 1, as we can apply a STOS colour cycle without affecting any of the other colours on the screen – bonus!

Exit Portals

Exit portals come in various different styles and are 16×16 in size. They have a simple inverse flash animation that makes use of the ZX Spectrum foreground and background flash functions, so we need to make sure we get the timing of this function correct. As we don’t have a flash function in STOS, we will either need to use a colour cycle or a simple inverse sprite. I’ve opted for a second sprite, as this means that we don’t have to worry about palettes or anything like that for a colour cycle.

Level Breakdown

Let’s break down the different levels that Manic Miner has. This way, we know what we have to achieve. We’ll start with “Central Cavern” (level 1) first of all, and we’ll add to this list as we progress with the episodes.

Level 1 – Central Cavern
ElementDescription
Solid FloorBright Red
Crumbling FloorDark Red
Number of Guardians1
Guardian Types1 x Yellow Trumpet Robot – L/R
Number of Items5 x Keys
NastiesBlue Stalactite
Green Cactus
Exit PortalBlue / Yellow in bottom right

Ok, I think we are about ready to start putting some code together. So check out Episode 2 to take a look at how we are going to get things setup.

Games Coding Competition 2020

Games Coding Competition 2020

Welcome to the STOS Coders Games Coding Competition 2020!  This year we have decided to challenge all you clever people in three different categories of games. Enter as many games as you like, in as many different categories as you like. Just remember, each entry can only qualify for one of the categories. Make sure you are familiar with the categories and the rules which are listed below. So, choose your category, and get coding!

One Liner

Can you write a game in just one line of code? Yes, you heard it, one line of code!  It’s been done before with some great results – let’s see if it can be done again.

Ten Liner

Ten times the lines, ten times the gaming fun? Let’s find out if it means just that. Write a complete game in ten lines of code.

One of Everything

The one of everything category means just that! You can have an unlimited amount of code, BUT your .BAS file is limited to one of each resource at program load. So you could for example have:

  • 1 sprite
  • 1 bob
  • 1 joey
  • 1 PI1/PC1 file
  • 1 NEO file
  • 1 Tile
  • 1 Map file
  • 1 Tracker file
  • 1 Chip Music file
  • 1 Sample sound
  • 1 Sound effect

But that is it!  It doesn’t matter how many memory banks you use – one massive one or lots of little ones – you can only have one of each type of asset in your game, not matter where it is stored! If you want to generate new resources whilst your game is starting up or during gameplay, no problem, go ahead, but your game must be up & running and ready to play within 30 seconds (when compiled) of running the file. The loading of asset files does not count towards your 30 seconds.

Guest Judge

This year we are pleased to welcome Francois Lionet as our very special guest judge. As many of you know, Francois is the creator of STOS and therefore is perfectly placed to select his winner from all the entries. He will be judging them on sound, graphics, originality and most importantly ingenuity and playability.

Prizes

There are some cool prizes up for grabs for the winners of each category. We also will be creating a compilation disk of all the entries once the winners have been chosen. Keep watching the website and Facebook as we reveal more details in the weeks ahead.

Submission

You must submit your entry to STOS Coders by 31st October 2020. E-mail your submissions to games@stoscoders.com including the following information:

  • Your name
  • The category which you want to enter
  • Your game attached as an uncompiled .BAS file
  • List of extensions used, along with their file extensions (if you have changed them) – even better if you can include a zipped copy of your STOS folder!
  • Anything else you think is relevant to your submission

All entries must be received before 23:59 (UK time) on 31st October 2020 to qualify.

The Rules

  1. You may enter as many different games as you like.
  2. You must tell us which category you are entering your game in. All games outside of the stated parameters for your chosen category will be disqualified. The adjudicators decision is final.
  3. Each game can only qualify for 1 category.
  4. All games must be “compilable”.
  5. Use as many data banks as you like, there are no restrictions, so long as the memory usage of the game sticks to the rules.
  6. No databanks can existing in your source code, you must load them from disk at runtime.
  7. Use whatever extensions you like, heck if you need to write a new extension for you game, even better! Tell us which extensions you are using though, and what file extension you are using so that we can create the correct environment to run them in.
  8. You can’t have an extension that just does everything. For example “10 runmygame” is not allowed.
  9. Everything has to be written using 100% STOS and extension commands.
  10. No assembler helper routines can be used.
  11. Your game must run on a 1Mb (or below) Atari ST or STE machine running at the standard 8Mhz.
  12. You give permission for STOS Coders to publish videos of your game on social media platforms (such as the STOS Coders Facebook Page), STOS Coders Websites and STOS Coders YouTube channels.
  13. You give permission for STOS Coders to distribute the source code of your game and any extension via social media platforms (such as the STOS Coders Facebook Page), STOS Coders Websites and STOS Coders YouTube channels as a standalone application, or part of a compilation.
  14. All entries must be received by October 31st 2020.
  15. The judges decision is final.
  16. Winners will be announced during November 2020.

Happy STOSing!

Bit Plane – O – Mania

By Neil Halliday

Bit Plane – O – Mania was an unfinished demo screen that I created in October of 1993 for a STOS Mega Demo that GBP were writing called “Hellbender”. I recently rediscovered the majority of the source code on one of my many floppy disks I have stored in the attic, but there were some elements missing. I’ve spent my spare time over the last week finishing off the screen so that I can make it available for download on the site. The code is by no means perfect, and I’m sure it can be optimised more, but it works.

The screen features:

  • Single plane 32×47 horizontal scroll text
  • Single plane vertical real-time sine waver scroller
  • 4 single plane sine wave sprites
  • 2 single plane moving logos
  • Lots of rasters (approx 256 colours on screen)
  • SNDH Music by Jochen Hippel (aka Mad Max)

Included in the zip file is the main BPOM.BAS file, which is the demo and some sub directories containing the source assets and utility programs for creating the data files in the correct format.

I’d love to hear your feedback on this demo screen, so please comment below!

DOWNLOAD

How Many Can You See?

By Bruno Azzara (GBP) & Neil Halliday (GBP/Storm/TYG)

The unfinished “How Many Can You See?” screen from the abandoned Hellbender demo that we were writing together in ’92/’93.  This is a “4 in 1” demo screen that features four mini demos in each corner of the display.

Top Left = Multi colour pixel perfect horizontal sine wave scroller

Top Right = Multi colour sine wave logos (this should have had single plane “GBP” sprites bouncing around too, but never got added)

Bottom Left = Traveling landscape (this should have had 3D balls bouncing around on it)

Bottom Right = Multi colour & multi line sine wave text


DOWNLOAD the full source code.

Using the Douglas Little 3D Routines

I thought it would be a good idea to include this additional information I posted up to the STOS Coders FB page. It’s to help those who want to make new models for DML’s 3D extension. A JPG screenshot has been included, showing a possible workflow in action.

I’d advise not using The Pixel Twin’s Utility Disk version that’s floating around in Floppyshop PDL (ie. UTL-3242.zip). It seems to be an earlier 1991 version and somewhat incomplete, so please use the later 1992 version included within this archive (which Doug posted to Atari Forum in 2014). You can modify the code within DML’s newer example file, STOS3D3.BAS much more easily to view/use your own models now too.

So, I have come up with a workflow that works well so far. I’m keeping my fingers crossed that we can eventually do more than just view a newly created model!

1) Model a low poly model in Blender 3D (https://www.blender.org/)

2) Export as a Wavefront *.OBJ file (you can probably try other formats too, I just used this one because I figured it would work fine and it did)

3) Load the *.OBJ file into 3D Object Converter v7.0 (http://3doc.i3dconverter.com/index.html) (799 3D object file formats supported!)

4) Save as *.3D2 format (Cyber Studio CAD-3D)

5) Load the *.3D2 model file into DML’s “CADCONV.PRG”

6) See DML’s own original doc for further info and get ready to be patient with all of this!
Use the arrow keys to navigate around the model, Z & X keys to cycle through each triangle. Clean up each surface by deleting the first triangle (with “DEL FACE”), then expand the 2nd triangle to make all surfaces appear like your original Blender 3D model. You will have to click on “EXP FACE” a couple of times, sometimes more. Then “EXP DONE” when finished. Recolour all surfaces to your liking. Only use the first 16 colours. If you mess up, reload the *.3D2 file and start again.

7) Click on the floppy disk icon “O” with the arrow pointing towards it, ie. 4th one in. Export a new object file set (*.X, *.Y, *.Z, *.OBJ) to a blank floppy disk image in drive A (not your HDD partition, as I don’t think it can save to HDD). The doc says it saves off a *.S file somewhere, it doesn’t, it’s an *.OBJ file (so remember to keep your original Wavefront *.OBJ files within a seperate folder from your output here, to avoid overwriting!). You just type in the name you want for the whole file set, but no extension required as it saves out 4 new files at once.

8) Modify the example file listing (STOS3D3.BAS), so you can load in your new model and view it. In line 10 you can modify the palette, I think this may need experimenting with to get the colours to match up correctly.

Then on line 46, you can change each filename similar to what I have done here:

46 I(X_LIST)=start(6) : I(Y_LIST)=start(7) : I(Z_LIST)=start(8) : I(S_LIST)=start(9) : I(FIL_PATS)=start(10) : bload “objects\cybercar.x”,start(6) : bload “objects\cybercar.y”,start(7) : bload “objects\cybercar.z”,start(8) : bload “objects\cybercar.obj”,start(9)

It should now display your new model, at least I hope so. Elon Musk won’t be hiring me for my new car design, that’s for sure!

Mike K

ps. Many thanks to Neil Halliday for tracking down The Pixel Twin’s Utility Disk! We were able to include the docs from that disk, with the later version posted to AF which I found later.

DOWNLOAD

For reference, here is an image of the workflow